Wednesday, August 22, 2012

Personalized Bag with Heat Transfer Vinyl


Machine Used: Boss Kut Gazelle
Software: Funtime Scrapbooking III
Files Used: Butterfly Silhouette 0327
Materials:Heat Transfer Vinyl, SS 6 Pink Rhinestones

I LOVE working with vinyl but just couldn't bring myself to work with the heat transfer vinyl.  I think that is mainly because it required bringing out my iron and I didn't want my dearest husband thinking that me ironing would become a regular thing.  ;o)  After making this project, I could just kick myself for waiting so long!!

My daughter received a very cute bag last year and it always bothered me it was so plain.  We used it for her dance class last session and will be using it again in September when her classes start back up.  I finally decided it was time to spruce it up!  Here's the bag before I got a hold of it.


Using the true type font, Vivaldi, I typed out my daughter's name "Mickaela" in Funtime.  When it came time to cut the vinyl, I made sure to mirror the image and used the weeding option in the cut menu.  Since this was my first attempt at heat transfer vinyl, I followed these great instructions by Mrs. Boss Kut herself, Phyllis!

 
I followed the same instructions when I applied the Butterfly Silhouette.  I will note here the importance of making sure you have a smooth surface to work with.  Where I applied the butterfly there are A LOT of folds in the bag, so the butterfly and I had a bit of a disagreement.  Don't you just love the learning experiences that come with learning new things in crafting!?!
 
With the rhinestones I followed the awesome tutorials provided by Terri on the Boss Kut Training website.  Be sure to watch all 3 of them!  She makes it so easy to follow and explains everything. 
 

As always, my daughter was very grateful with new additions to her bag.  I just hope that I'll be able to get her to put it down sometime between now and when dance class begins.

Now that I've jumped both feet first into heat transfer vinyl and rhinestones, I can't wait to get more projects done.  I'll just have to wait until my husband is at work so that he doesn't see me with the iron out!  ;o)

Thanks for looking!!
*´¨)
¸.•´¸.•*´¨) ¸.•*¨)
(¸.•´ (¸.•` ¤ Jamie *´¨)
Bosskut Design Team Member

Saturday, August 18, 2012

Dragonfly Kusudama Flowers


Machine Used: Boss Kut Gazelle
Software: Funtime Scrapbooking III
Files Used: Pop-Kut Dragonfly by Judy Stark BKD109
Materials: Cardstock

I absolutely LOVE the Pop Kuts available through Bosskut Die Cuts!!  Another one of my favorite projects includes origami.  Having wanted to find a way to incorporate the 2 together, I was finally able to work my through using the tools available in Funtime to get the look I wanted.

With the help from the video, Using the Edit Tools, I was able to edit the Pop Kut Dragonfly so that it would still be attached to the paper that I needed to fold for each of the pedals of the Kusudama flower.  First I started by creating a border around the Pop Kut dragonfly.  Then I created a square and placed the dragonfly at a corner.  Using the scissors in the edit tools, I cut where I needed and reattached in other places.  I will honestly admit that this took some trial and error until I finally got what I was looking for.  In the end, I'm very happy with how they turned out and I look forward to making more!!


Another, easier option was to first assemble the Kusudama flower and cut out the dragonfly separately.  I then attached the dragonfly to the Kusudama flower and am ready to make more for a complete bouquet!!


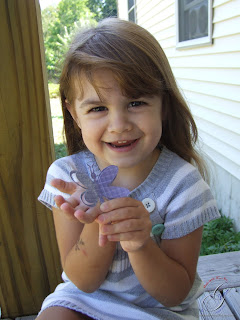
Just for fun, whenever my daughter sees me working on a project I always end up with A LOT of "help" :o).  When she saw the dragonfly, of  course she wanted one too BUT it had to be in purple!  So I let her pick out the paper and we made her one just for her.


Thanks for looking!!
*´¨)
¸.•´¸.•*´¨) ¸.•*¨)
(¸.•´ (¸.•` ¤ Jamie *´¨)
Bosskut Design Team Member

Saturday, August 11, 2012

Lions, Tigers, and Wings . . . OH MY!!!


Machine Used: Boss Kut Gazelle
Software: Funtime Scrapbooking III
Materials: Glass mugs, Oracal 631 vinyl, Armour Etch

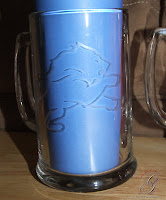
A just for fun project and because I had 3 left over plain glass mugs I decided to add some of my favorite teams to them. 


The picture above simply shows the vinyl on the glass.  I LOVE the option in the Funtime to "weed" just before cutting your design.  All is simply does is add a rectangle around your design to make it easier to removed the parts of the cut you would like to etch on the glass.


Above you can see all the etching cream that I've added to the glasses.  After I've applied the layer of etching cream thoroughly on the glass, I wait 7.5 minutes.  Once the timer goes off, using my paint brush, I work the etching cream around again to avoid having missed any spots.  I'll also add addition cream if I feel that it needs any.  I set the timer for another 7.5 minutes and usually am not waiting so patiently.  :o)

Once the timer goes off, I remove any excess etching cream and put it back in the bottle for future use.  Then I rinse the rest of the cream off in the sink and removed the vinyl.

Here's a good place to note: I made a bit of a mistake on the Red Wing mug.  I was working on all 3 mugs at the same time.  What I did was rinse a mug then set it in the sink and moved on to the next one.  After I had all of them rinsed once, I would removed the vinyl.  The problem with that was when I rinsed them the first time around, some of the vinyl would raise off of the glass and etching cream would get underneath it.  What I should have done was, rinse a mug, removed the vinyl, and then finish rinsing it off completely.  This would have kept the etching cream from seeping underneath the vinyl.  Leason learned!!


Now all my mugs have been safely stored in the freezer for the next time they may be needed.  I foresee that happening sometime this evening!!  :o)

Thanks for looking!!
*´¨)
¸.•´¸.•*´¨) ¸.•*¨)
(¸.•´ (¸.•` ¤ Jamie *´¨)

Wednesday, August 1, 2012

Words of Wisdom for the Mommy-to-be


Machine Used: Boss Kut Gazelle
Software: Funtime Scrapbooking III
Files Used: Eyelet Baby Bottle Tag by Judy Stark BKD113, Little Dumpling Boy (colored) by Digital Delights by Louby Loo
Materials: Cardstock, ribbon

It just seems to me that sometimes the simplest projects are the ones that have the most impact!

I keep hearing about first time pregnancies so much lately and I'm so excited for these families!  Almost makes me want another one . . . . ALMOST!!  :o)  With these new pregnancies brings the thoughts of baby showers and all the confusion that comes with a new baby.

For this project I decided to go with cards that can be passed out at the baby shower that offers the attendees to provide words of wisdom to the mommy-to-be.  So simply made, it's easy to make as many as you'd need for the baby shower, then place them at the tables and let the attendees go!!

Before I get to much further into how I made these, I want to point out how easy it is save on paper even with the 3pt print and cut.  In the Funtime software you can simply move the crop marks closer to the image that you want to cut around.  In the image below, you can see that I had other things that I had worked on in other projects.  I followed the steps as usual with print and cut after moving the crop marks and was able utilize more the paper.


Back to my project, I started out using several different patterns of paper and cut out the beautiful Baby Bottle Tag by Judy Stark, making sure to print the smaller rectangle in white cardstock.  The white cardstock is where the attendees with write their words of wisdom to the mommy-to-be.  Let me just say how wonderfully this cut!!


What a fun, cute little tag that the mommy-to-be will cherish forever!  Make sure to have the attendees sign their words of wisdom so that there will forever be a record of their participation.


After all the tags have been collected be sure to secure them together at the top with some ribbon.
Thanks for looking!!
*´¨)
¸.•´¸.•*´¨) ¸.•*¨)
(¸.•´ (¸.•` ¤ Jamie *´¨)
Bosskut Design Team Member
Related Posts Plugin for WordPress, Blogger...