Showing posts with label Boss Kut Design Team 2012. Show all posts

Tuesday, January 1, 2013

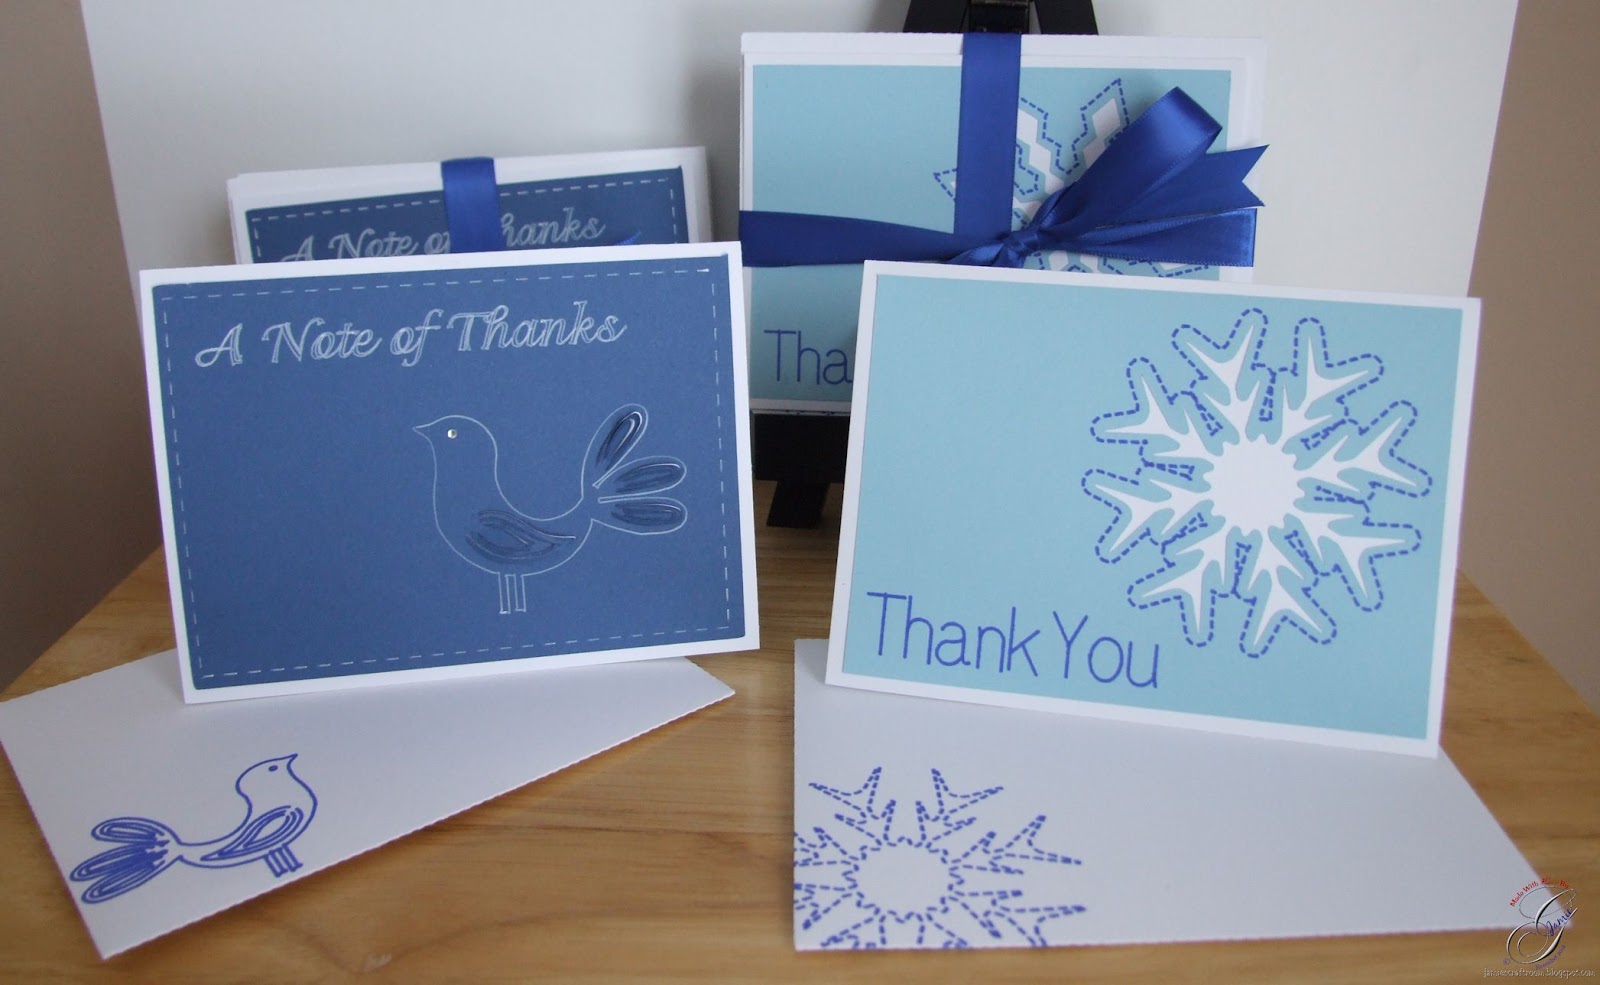
Thank You Cards and Envelopes Gift Set


Machine Used: BossKut Gazelle
Software: Funtime Scrapbooking III
Files Used: Layering Snowflakes by Debbie Grommet BKD 078, Sassy Bird Pop Kut 0421
Materials: Card stock, Pen of choice, rhinestones

For this project, I had several different objectives in mind.
  • To have the envelope and card match.
  • Keep the card design CAS (clean and simple) so that I could easily make lots of them as needed.
  • With the simplicity of the design, I could give sets to family and friends as gifts no matter their taste.
For the snowflake thank you card set, I started in Funtime by taking the layering snowflakes and outlined them.  I then changed the line to a kiss cut line.

Using a blue Sharpie pen, I let my Gazelle "cut" out the sentiment and the outline of the snowflake.  I replaced the pen with the blade and let my Gazelle cut out the snowflake and the rectangle.  I attached the light blue paper to a white card base and simple enough.

The envelope was just as easy.  I created the envelope cut file in Funtime and positioned the matching snowflake where I wanted it.  Again using the blue Sharpie I "cut" out the snowflake and changed back to the blade to cut and score the envelope.


For the thank you card set with the pop kut sassy bird, in Funtime I choose 2 colors to work with. This made it easy when it came to cutting my project and to differentiate between what I was actually cutting and what I was "cutting" with my pen.

I started by creating 2 rectangles and centering them.  The inner rectangle I changed the line to a kiss cut line and made sure that the rectangles had 2 different colors.  For the sentiment and the outline of the bird, I made sure to make them the same colors as the kiss cut on the smaller rectangle.

Once I had everything laid out as I wanted it, I inserted a white gel pen into my Gazelle and "cut" the kiss cut rectangle, the sentiment, and the outline of the bird.  I exchanged the pen with the blade holder and cut out the rectangle and the wings, and the tail feathers of the bird.

I just loved the way the white gel pen created a perfect faux stitching effect on the rectangle!

As with the previous envelope, I created the cut lines and then placed the bird I wanted it.  I "cut" the bird out using a blue Sharpie and then the larger rectangle.
 
 
The picture below shows the 2 different kiss cut options available in Funtime.  You can easily access these by selecting the line that you would like to change, then select Setting > Brush / Pen.  Keep in mind that the next line you create will be the last pen option you choose.
 

Thanks for looking!!
*´¨)
¸.•´¸.•*´¨) ¸.•*¨)
(¸.•´ (¸.•` ¤ Jamie*´¨)
BossKut Design Team Member

For more projects and information, please click links below:
BossKut Gazelle Blog
BossKut Company Blog

Sunday, December 30, 2012

Winter Scene


Machine Used: BossKut Gazelle
Software: Funtime Scrapbooking III
Files Used: String of Lights by Judy Stark BKD 165, Bunny Silhouette by Karen Taglia 0341,
Materials: Card stock, embroidery thread, Glossy Accents, Mod Podge, fine glitter

For this project, I started out by following Terri's video on how to convert any digital coloring book page to a piecing or print & cut file.  I found a great site with some beautiful Christmas coloring pages and printed the page in the recommended PDF format.  Or you could right click on the image and save image as a PNG to your computer.  Either way, Funtime can import the image to create a cut file.  I just LOVE the fact that Funtime can import all sorts of file types including SVG, DXF, EPS, AI, PDF, images (JPG, BMP . . . ), and several others!!

Then I imported the Christmas House Coloring Page and used the auto vecto to create the cut file.  I changed the color of the lines so that when it came to cutting out specific colors I was only cutting out the shapes that I needed in each color.

Since this was a larger image, I duplicated the whole image and changed the pen style to the kiss cut.  I made sure to leave my outer most rectangle as the regular cut.  Doing this allows me to cut out the rectangle (in this case) and then leave the pattern to follow while I'm piecing my page together!  Love this tip, BIG thank to Terri for this one!!  Make sure to watch the entirety of the video shared above to see how easy this is to do.
 

Once all my pieces were cut out, I glued them onto my background.  I then mixed a small amount of some fine glitter with Mod Podge and "painted" it on to the snow.  It's just something to see freshly fallen snow when the sun is shinning that simply amazes me!!


Since you can't complete a winter scene without some adorable woodland creatures, I added in a couple of the Bunny Silhouette by Karen Taglia. Hey, bunnies are just for Easter!! ;o)  These little bunnies measure 0.477 by 0.363!  Very tiny and my Gazelle did an incredible job at some very clean cuts.

Using green embroidery thread, I outlined the house where I wanted to string the Christmas lights.  Then using the individual lights from the String of Lights by Judy Stark I cut some out and applied them to the string.  To give the light bulbs more dimension I added some Glossy Accent Tones.  How big are the light bulbs you ask?  Each one measures 0.139 by 0.217.  Once again, my Gazelle doesn't disappoint.  She cut each one beautifully!!


I wrapped a jump ring (usually used with making jewelry) with green embroidery thread for the wreath on the door.

I originally made this with the thought of if being a card but as I put more into it I've decided to frame it.  I had so much fun with this simple paper piecing that I'm already on the hunt for more coloring book pages that I can create with!!

Thanks for looking!!
*´¨)
¸.•´¸.•*´¨) ¸.•*¨)
(¸.•´ (¸.•` ¤ Jamie*´¨)
BossKut Design Team Member

For more projects and information, please click links below:
BossKut Gazelle Blog
BossKut Company Blog

Thursday, December 20, 2012

It's OK to Say Merry Christmas!


Machine Used: BossKut Gazelle
Software: Funtime Scrapbooking III
Files Used: Reindeer Cookie Holder by Judy Stark BKD 169
Materials: Heat Transfer Vinyl, Rhinestones

For this shirt I used the reindeer from the the Reindeer Cookie Holder by Judy Stark.  I just thought that he'd look so cute peeking out of a pocket of a shirt! 


I started with heat transfer brown vinyl for the head and used the beautiful heat transfer red glitter vinyl for the nose.  For the eyes, I applied 10ss cobalt rhinestones.  It was a VERY easy addition to a simple shirt that's perfect for the holiday season!!


This shirt is inspired by a pin I received a few years back and thought it would look perfect with some of that beautiful heat transfer glitter vinyl available through Boss Kut!!  Knowing that my Mom would love this shirt, I offered to make one for her too.

I started by typing out my text in Funtime.  For the top portion of the sentiment "It's OK to say" I wanted it to arch.  To do this I created an oval and selected both the sentiment and the oval.  Then from the top tool bar I clicked on "text" and then "fit text to path."  I made my selections in the next control panel that popped up and voila!!  Easily done.  :o)  For a much better tutorial on how to do this in Funtime, be sure the check out Jules tutorial!!

Once everything was as I wanted it, I set everything on my mat in Funtime as I wanted it to appear on the shirt.  I didn't cut it this way because that would waste A LOT of material but I'm a very visual person and it helps when lining everything up on the shirt.

Make sure when you cut your design that your vinyl is face up on your mat and the transfer material is on the mat.  Cut your design in reverse.  Funtime makes this really easy!  Once you've created your design, and you're ready to cut, go into the Cutting Control Panel.  Under "2. Advance Options" there's an option to "Mirror" your image, select it.  I also always select the "Weeding" option when working with vinyl.


Once everything was cut and weeded, I started at the top and ironed everything onto my shirt.  With this design there was 3 different things to iron on, the top sentiment, the nativity scene, and the bottom sentiment.  After the first one was ironed on, I made sure that the iron did NOT touch the vinyl that was already done.  I didn't want to over heat the vinyl and cause it to melt.

Directions:
•1. Cut design in reverse Note: Weed design carefully!
•2. Prepare heat press at 300 to 350 degrees F
•3. Press for 15-20 seconds with medium pressure (note: too much pressure will result in glitter baking off of transfer)
•4. Peel backing cold
Can be applied with a hot iron. Set the iron to cotton linen setting. No steam. Place a cover sheet, kraft paper, cloth etc. over transfer and heat for 15 to 20 seconds. Turn to inside of garment and heat again for 15 to 20 seconds. Be sure you test your fabric first.
Washing instructions:
Wash cool temperature. Turn garment inside out. Tumble dry up to 140 degrees.

Thanks for looking!!
*´¨)
¸.•´¸.•*´¨) ¸.•*¨)
(¸.•´ (¸.•` ¤ Jamie*´¨)
BossKut Design Team Member

For more projects and information, please click links below:
BossKut Gazelle Blog
BossKut Company Blog

Monday, December 17, 2012

Christmas Gift Card Holders


Machine Used: BossKut Gazelle
Software: Funtime Scrapbooking III
Files Used: Journaling Block 0411, Pop Kut Angel by Judy Stark BKD161, Snowman 0615, Penguin by Olivia Myers 0607,
Materials: Card stock, ribbon, glitter paper

Being a military family, we have family everywhere.  I have nephews in California and nieces in Japan.  I live in Michigan!!  I would much prefer to give gifts for my nieces and nephews to open on Christmas day, but unfortunately shipping costs can really put a strain on an already very budget conscious month.

That's leads me to this project.  I like to send gift cards so that they can go shopping at their favorite store!  Now, I can't just send a gift as impersonal as a gift card and NOT do something special!!  That would be a crafting crime and my Gazelle so loves the work.  :o)


Starting out in Funtime I created a very basic and simple card to hold my gift card.  Then using the true type font Honey Script, I typed out the names that I needed for each card and welded the letters together.  With the awesome feature to use ANY pen, I put a Sharpie in where the blade holder would go and let my Gazelle "cut" out the names for me!  I replaced the pen with the blade holder and then cut out the journaling block around the names.  Then I secured the name tag to the gift card holder with ribbon.


For my beautiful nieces, the Pop Kut Angel was the only one that I personally thought fit perfectly for them!  I added gold stickles around the halo and clear stickles for accents to her. 


For my handsome nephews I used the Snowman and Penguin.  For the whites of the snowmen and penguins I used a mixture of half white glue and half shaving cream for added texture.

With the snowmen I used the beautiful blue glitter paper, available at Boss Kut, for the scarf and the trim on the hat.


The penguins are decked out in their red glitter hat and scarf. To give those cute little cheeks a rosy glow, I used a Q-tip dipped in some ink and dabbed it on.


These 6 gift card holders are finally ready for some very special kiddos! Now, I just need to get to the store and get those gift cards.

Thanks for looking!!
*´¨)
¸.•´¸.•*´¨) ¸.•*¨)
(¸.•´ (¸.•` ¤ Jamie*´¨)
BossKut Design Team Member

For more projects and information, please click links below:
BossKut Gazelle Blog
BossKut Company Blog

Thursday, December 6, 2012

Christmas Countdown Frame


Machine Used: BossKut Gazelle
Software: Funtime Scrapbooking III
Files Used: Swirly Holiday Tree by Judy Stark BKD 166, Pop Kut Angel by Judy Stark BKD 161Santa Bag by Lisa Schmidt 0882D
Materials: 12 x 12 frame, card stock, glitter paper, vinyl

I remember fondly as a child when my Mom would make a countdown calendar by hand on index cards.  My brothers and I would take turns pulling of the day and watching the numbers get smaller.  I can still feel the excitement!!  :o)  While I sincerely appreciate all the hard work my Mom put into that, I decided that I would take a different route with the intentions of being able to provide for my children that same excitement.
 
For this project I started out with a very plain 12 x12 slate grey frame with a 5 x 5 opening for a picture and as any crafter knows, that just won't do!  For the top third, I added white vinyl and the bottom green vinyl.  To ease the transition from white to green vinyl, I added some red ribbon.


The numbers that countdown to Christmas are on a simple ornament that I created in Funtime using 2 basic shapes.  I started with a circle and a square that I had rounded the edges on.  After welding them together, I went into the special effects and added the charm feature.  Very simple and gave me exactly what I was looking for!

When I had one completed, I placed it in the lower left hand corner of my mat.  In the transformation box I multiplied the number of ornaments by 13 and selected the fill page option.  Before cutting, I ran a green sheet of card stock through my Xyron machine and laminated both sides of the card stock.  The reason I chose to do this was to give the ornaments more durability since my almost 4 year-old daughter and 2 year-old son will be "helping" me count down.  My Gazelle cut it like a dream!!


After layering the numbers in red and white card stock, I used a mixture of half white glue to half shaving cream for added dimension.  Once I had the "snow" on the numbers, I added some extra fine glitter for that fresh fallen look!  To complete the look, I added a couple strands of thin ribbon to the top.

I used the true type font SantasSleighFull Bold for "days until Christmas."  The green outline is cut from card stock and the red is cut from out door vinyl.  Once I layered it, I went along the outside of the red vinyl with a white extra fine Sharpie paint pen. 

The silhouette of Santa's sleigh I found during an online search for coloring pages.  After saving the image, I imported it into Funtime and created a cut file from it.  This image is only 3.5 inches wide and about 1.75 inches high!!

Due to the thickness of the numbers, I needed a place to store them.  My hooks just aren't big enough to accommodate all of them at once.  So, using the adorable Santa Bag, I started by cutting out the bag in red glitter paper and the top trim in simple white card stock.  The red glitter paper cut beautifully and there was absolutely no mess from glitter falling off!!

 
Using the same mix from the numbers, I added the fluffy white mixture to the top of the Santa bag and tied the top with some twine.  To make a box out of it hold the numbers, I simply cut out a rectangle that was about an inch wide and 5 inches long.  I scored it and folded it so that it would form a shelf with tabs on the sides to glue it to the bag and the frame.

The presents I added are scrap pieces of paper that I cut into small rectangles and then added some ribbon to it.


The beautiful Swirly Holiday Tree is a new release from BossKut.  After cutting the tree from the green glitter paper, I added it to the outline using Mod Podge for the glossy look.  I also decided to add a tree skirt by easily cutting out an oval from some patterned paper.

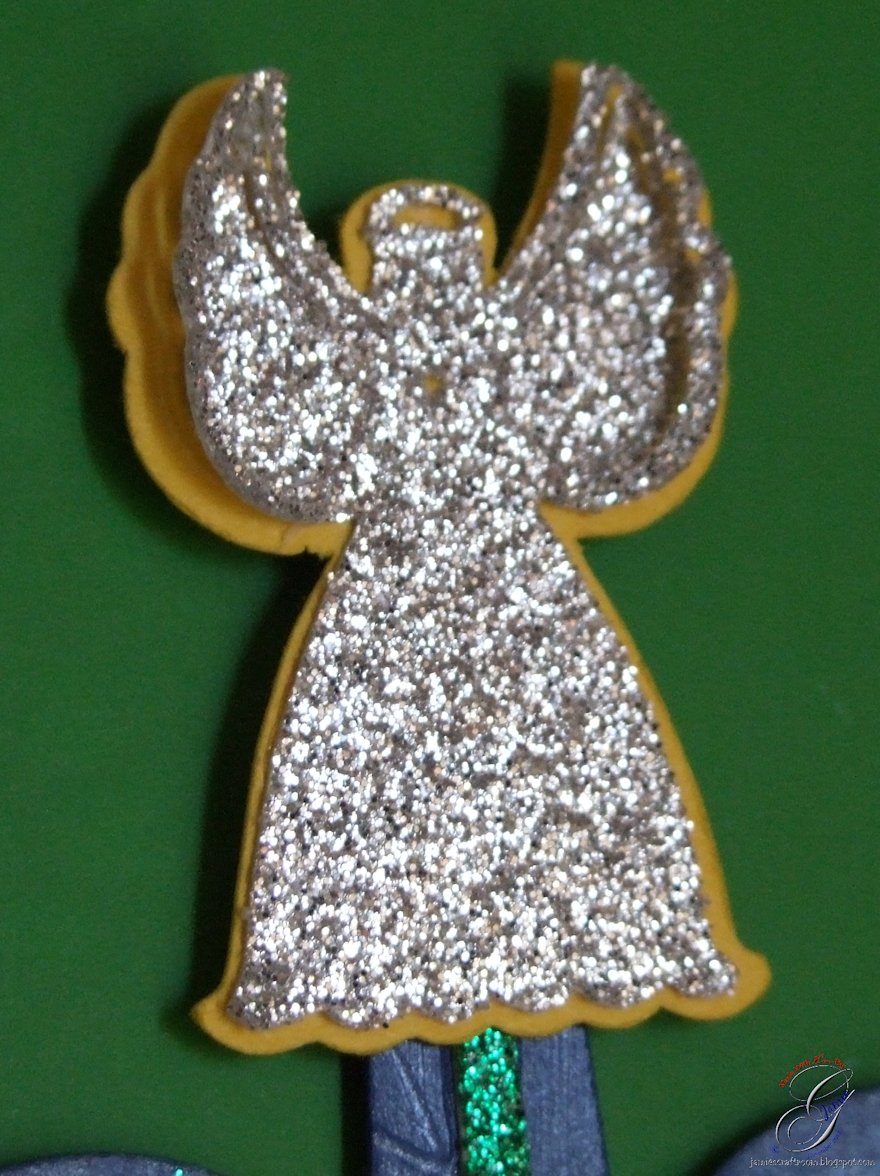
I chose to top my tree with the Pop Kut Angel.  She's absolutely gorgeous and I love how the pop kut wings gave added dimension to my frame.  This little beauty measures only 1.25 inches high and look just how well she cut out from the glitter paper!!


Thanks for looking!!
*´¨)
¸.•´¸.•*´¨) ¸.•*¨)
(¸.•´ (¸.•` ¤ Jamie*´¨)
BossKut Design Team Member

For more projects and information, please click links below:
BossKut Gazelle Blog
BossKut Company Blog

Friday, November 9, 2012

Hot Chocolate Gift Bag


Machine Used: BossKut Gazelle
Software: Funtime Scrapbooking III
Files Used: Coffee Mug with Candy stick by Judy Stark BKD 157, Snowflake II by Phyllis Parkins 0876
Materials: Cardstock, vellum, rhinestones, brad, cotton ball
Challenges: The Outlawz Paper a la Mode - Make a Gift

While I feel that generosity spread year round is the best, it always seems this time of year that most people want to give.  I believe that's way this is my most favorite time of year, well, that and of course the snow (I live in Northern Michigan).  This really makes it easy to think of projects that include giving a little something else to someone and put a smile on a face.

Here's a simple gift that you can give to family, friends, or co-workers.  You could also easily tie the ribbon at the top with a loop in it to leave on the handle at home of someone that may need a little extra warmth.

I started by creating a cut file in Funtime that created a 2-sided pocket bag.  I rounded the corners of opposing ends and added 2 holes to each end for the ribbon.  When I'm done decorating my bag, I'll add a packet of hot chocolate to each side along with a candy cane.


When BossKut showed off the coffee mug as a new release I LOVED IT!!  Such a cute design and the details are beautiful.  When I cut the straw out of the awesome glitter paper available at BossKut there was absolutely no glitter flaking and my Gazelle cut through it with ease.  I saved the negatives from the straw to add into the cool whip, hey, no wasted paper here!  ;o)  For the cool whip, I added a piece that I tore from a cotton ball.


For the beautiful snowflake, I started in Funtime by adding a border.  Then I changed the blade in my Gazelle to the embossing tool and put a sheet of vellum on my embossing mat.  Using a force of 3 and 3 passes, I "cut" the snowflake and all the details of the snowflake.  After the image was embossed on the vellum, I changed back to my blade.  I changed the force to 1 and the passes back to 1 and cut out the border around the snowflake.

 
Then I used a brad to secure the snowflake to my mug and added some rhinestones

Thanks for looking!!
*´¨)
¸.•´¸.•*´¨) ¸.•*¨)
(¸.•´ (¸.•` ¤ Jamie*´¨)
BossKut Design Team Member

For more projects and information, please click links below:
BossKut Gazelle Blog
BossKut Company Blog

Tuesday, October 30, 2012

Give Thanks Easel Card


Machine Used: BossKut Gazelle
Software: Funtime Scrapbooking III
Files Used: Oak Leaves 0449, Maple Leaf by Judy Stark
Materials: Card stock, glitter, brads
Challenges: The Outlawz Saturday Paper a la Mode - Use Negative Space

Creating an easel card in Funtime is really very simple.  I'm going to use the very basics of tools, going step by step to make it super easy to follow along!  Be sure to check out the video tutorials available.  I've watched each of them at least once and many of them countless times.  I like going back to watch them because I've always seemed to forget something!!

I start out by creating a rectangle, making sure that it's selected, and then right click on it.  That will bring up a list of options; at the bottom select either height or width.  The transformation box will pop up with another list of options.  Select "Condense" so that it is highlighted in blue, then change the W. to 8 and the H. to 4, select apply.  These are just the dimensions that I chose for this project.

 
Then you have a couple of options, you can either create 2 score lines in Funtime or once you've cut the rectangle you can use a scoring tool and do it by hand.  For learning purposes, I'm going to explain how I do it in Funtime.
 
Now that the rectangle is the size I want it, I'm going to put it in the lower left hand corner so that I can make sure the score lines will line up where I want them.  I start by selecting the rectangle and then click on the transformation box again.  This time I'm going to select "Position," and then change the X Pos. to 0 and the Y Pos. to 0, select apply.  This will place the rectangle in the lower left of your mat.

 
For me personally, I like to make my cut lines and my score lines 2 different colors.  I do this just in case some times I want my Gazelle to score my lines and then other times I may choose to do that by hand.  It just depends on how many items I'm making.
 
After selecting another color from my color palette, I select the scoring tool.  In this tutorial I'm just going to place my score mark anywhere on my mat, concentrating on making sure that it's straight.  I do this because it's easier for me to use the transformation box options to change the height and the position.
 
Select the score line and select height this time in the transformation box.  Change the H. to 4, select apply. I'm using 4 as the height because we want to score the full height.  Then select the position, change the X Pos. to 2 and the Y Pos. to 0, select apply.  This will place the score line along the 2 inch mark along the X axis and right against the Y axis.

 
We need 2 score lines on this card, so we will use the same technique.  Create the score line, change the height to 4 but this time after selecting position, change the X Pos. to 4 and the Y Pos. to 0.


For my card in this example I rounded the edges of the card.  You can do this by first selecting "manipulate elements" and then "round corner."  When you first select a corner of your rectangle a box will pop up asking for the radius value.  I used 0.25 for this project, then click on OK.  It will change the corner you initially clicked on.  Click on the rest to change them as well; the box asking for the radius value will not pop up again.
 

Once I have the base of my card completed, I usually make a couple extra layers for future use.

One last thing I do before saving and closing my project (besides making something :o)) is select the entire base, including the cut and score lines, and group them together.
 

I hope this helps you in creating that special card for someone special!  Be sure check out the video tutorials  and don't forget to drop by the BossKut Forum Learning/Training Center.

Thanks for looking!!
*´¨)
¸.•´¸.•*´¨) ¸.•*¨)
(¸.•´ (¸.•` ¤ Jamie*´¨)
BossKut Design Team Member

For more projects and information, please click links below:
BossKut Gazelle Blog
BossKut Company Blog

Friday, October 26, 2012

Halloween Welcome Sign

 
Machine Used: BossKut Gazelle
Software: Funtime Scrapbooking III
Files Used: Bat Pop Kut by Judy Stark BKD039, Broom Riding Witch by Judy Stark BKD044Haunted House by Olivia Myers 0486, Flying Ghost by Olivia Myers 0493, Ghost Pumpkin 0498, Happy Ghost by Olivia Myers 0494
Materials: Piece of wood, vinyl, card stock, Mod Podge, origami paper

I just love Halloween!  It's so much fun and I enjoy all the decorations that go with it.  I'm having a blast putting my Gazelle to work.

For this project I started out with a plain white wood scrap that I got for free at a local hardware store.  I've had this for the longest time and just wasn't sure what to do with it!  I used some fine sand paper on the surface I wanted to work with because I wanted to make sure that the scrapbook paper I was putting on it would stay.  I also sanded down the edges a bit for a smoother

 
Then using Mod Podge, I put a layer over the whole surface and put my scrapbook paper on top. Again, I put a layer of Mod Podge on the paper.

 
While I was waiting for the Mod Podge, I hopped on Funtime and got to selecting the images for my welcome sign.  Using the Funtime font Frankenstein, I typed out "Welcome" and "The Gillahan's."  I added a border and cut it all out using vinyl.
 
In Funtime, I placed the ghosts where I would want them in the windows and using the scissors I "cut" them so it appeared that they are in the house.
 
To help complete the look, I cut out a circle for the moon for the witch to ride across.  I added some chalk to the sides of the haunted house and some glitter to the ghosts.

 
I really enjoy making kusudama flowers!!  I make them for all sorts of occasions and enjoy giving them to family and friends.  When I first started making them, I started out by following this tutorial by Folding Trees.  It gives 2 different options for folding them and the instructions are really easy to follow.

BUT I could just stop at making kusudama flowers!  There's always has to be a way to incorporate them into the season.  For these ones, I started out by using a file that was shared by Jules in the Gazelle Owner's Forum during a challenge.  It's another great reason why if you're a Gazelle owner to visit the forum from time to time!!

Using the spider web that she created, I cut it into quarters and sized it appropriately for the size paper I chose.  If you haven't made or looked at the instructions for making these flowers, each pedal is a single sheet of square paper.  While I've used thin scrapbooking paper before, I used black origami paper for these.

I finished off my flowers by adding them to floral stem with a bead in the center.  13 flowers in total, with one of them housing a beaded spider.  :o)

This was one of those projects that I truly was able to incorporate several different crafting projects that I enjoy doing!


For more information on how I added each flower to a stem, please visit my blog post here.  Or for more information on this bouquet, please visit my Halloween Kusudama Flowers

Thanks for looking!!
*´¨)
¸.•´¸.•*´¨) ¸.•*¨)
(¸.•´ (¸.•` ¤ Jamie*´¨)
BossKut Design Team Member

For more projects and information, please click links below:
BossKut Gazelle Blog
BossKut Company Blog

Tuesday, October 16, 2012

Friendly Ghosts


Machine Used: BossKut Gazelle
Software: Funtime Scrapbooking III
Files Used: Ghost Pumpkin 0498
Materials: Glad Press'n Seal

Back again with another Boss Kut Die Cut inspired and Pinterest twist project!!  I've been looking for that one project where I can attempt a project that is larger than my mat size.  So, following Terri's incredible training video I "cut" up the adorable ghost from the Ghost Pumpkin 0498.  I just love the smile on his face and friendly feel he brings to the house!

The for the "ghostly" effect, I used Glad Press'n Seal.  To keep the number of cuts down, I used the 12 x 24 matThe large ghost in the door wall is 41.15 inches high.  This ghost is in 5 different pieces and you can obviously tell that I didn't use the whole ghost.


Note: When putting the press'n seal on the mat only press down enough to make it stick to the mat.  Too much and it will cause problems removing it after you've made your cut.  Also, when you put the press'n seal on your window or glass, do NOT press it down.  The static cling, will keep it against the surface as you position it where you want it.  Then in places where it is curling up, use 1 or 2 fingers and press down there.  Pressing the whole cut will make it wrinkle and when you take it down, there's A LOT more clean up.

The ghost on the mirror is 18.75 inches high.  I used the 12 x 24 mat again so that I could cut him out in one piece.  Well, I guess it's technically 2 but that's just how the cut file is made.  :o)


I still can't get over how adorably cute this ghost is!!  My children love it and it makes Halloween less scary for the younger ones.  It's an incredibly easy project that can spruce up your home for Halloween!


Thanks for looking!!
*´¨)
¸.•´¸.•*´¨) ¸.•*¨)
(¸.•´ (¸.•` ¤ Jamie*´¨)
BossKut Design Team Member

For more projects and information, please click links below:
BossKut Gazelle Blog
BossKut Company Blog

Friday, October 12, 2012

Thinking of You Card and Kusudama Bouquet


Machine Used: BossKut Gazelle
Software: Funtime Scrapbooking III
Files Used: Pop-Kut Butterfly Border by Judy Stark BKD152, Ruffled Butterfly by Judy Stark BKD105
Materials: Cardstock, ribbon, shank style buttons, stem wire, rhinestone
Challenges: The Outlawz Paper a la Mode - Thinking of You

It doesn't matter what time of year it is or what holidays are around the bend, sometimes you just need to let someone you know that you're thinking about them.  For this project I wanted to send a very special someone a handmade card and a bouquet of flowers that she's mentioned she likes.  :o)

With the new Pop-Kut Butterfly Border available, I just knew that I needed to use it!  It's absolutely adorable and sure to put a smile on any one's face!  With the one on this card, I added some color on part of the wings and some glitter.


I don't have a large collection of stamps with just the right sentiments but the print and cut option, it's really easy to say just the right thing.  In Funtime, I create the sentiment, with the fonts and colors I like and simply cut the shape around it!

 
I wrapped some thick ribbon around my card and using pop dots attached the sentiment.


With the Ruffled Butterfly, I added some glitter on the pop kuts of the wings and a rhinestone on the head.  In order to incorporate it into the bouquet, I used a floral stem wire and glued that between the the 2 pieces.  A simple addition to the bouquet that really makes it!!

A simple card and a bouquet of handmade flowers are now on their way to brighten the day of one very special woman!

Thanks for looking!!
*´¨)
¸.•´¸.•*´¨) ¸.•*¨)
(¸.•´ (¸.•` ¤ Jamie*´¨)
BossKut Design Team Member

For more projects and information, please click links below:
BossKut Gazelle Blog
BossKut Company Blog

Thursday, October 11, 2012

Pumpkin Teapot Card and Tea Bag Gift Box


Machine Used: Boss Kut Gazelle
Software: Funtime Scrapbooking III
Files Used: Pumpkin Teapot by Judy Stark BKD145, Presleys Curls by Judy Stark BKD101
Materials: Cardstock, pearl brads, ribbon
Challenges: The Outlawz Twisted Thursday Challenge - Pumpkin Twist

When the Pumpkin Teapot by Judy Stark BKD145 was released by BossKut I was so excited to be able to use this adorable cut file!!


For the card I started by cutting out the layers and rounding out the edges in Funtime.  I didn't want to take away from the adorable teapot, so I kept it simple. I added some clear stickles to the eyes, nose, and mouth for a little more added dimension.


I added the sentiment "Take time for Tea" to Presleys Curls by Judy Stark BKD101 and used the print and cut feature to print the sentiment out with my printer. Then using stickles, I added some glitter to the curls. With a green ribbon, I threaded it through the top and bottom of the cut file to attach it to the card.


The tea bag gift box took a little more time while working with Funtime.  I first had to create the bottom of the box but with the help from the training videos available through BossKut I was easily able to create it.  Then I took the border of the teapot and copied it so that I had 2 (this will create the front and the back of the gift box.  With the welding tool in Funtime, I attached one of the teapots to each side of the bottom of the box I created and welded them all together.  I added some kiss cut lines to where I wanted the gift box to fold and voila!!  My gift box is completed and now all I had to do was decorate it.

After cutting out the teapot and the lid, I added a small piece of yellow paper behind the eyes, nose, and mouth.  Then I added some clear stickles to the eyes, nose, and mouth to give it some more dimension.  The green ribbon at the top holds the gift box together until you're ready for some tea!!

Thanks for looking!!
*´¨)
¸.•´¸.•*´¨) ¸.•*¨)
(¸.•´ (¸.•` ¤ Jamie*´¨)
BossKut Design Team Member

For more projects and information, please click links below:
BossKut Gazelle Blog
BossKut Company Blog
Related Posts Plugin for WordPress, Blogger...