Showing posts with label Christmas. Show all posts

Wednesday, December 30, 2015

BELIEVE Polar Express Tickets


One of my all time most favorite movies is without a doubt The Polar Express.  This project is, of course, inspired from that very movie.  Wanting to keep the magic alive for as long as possible, I created these tickets and gave them to my children.

After a little search on the wonderful world wide web, I found a beautiful printable ticket.  I printed it out on photo paper.  Then on one side of the front and back, using a ¾" circle punch to add in a notch.  The reason I only did one was to make it easier to line the front and back together.

Using my Xyron Creative Station, I put permanent adhesive on the front and the back copies of the
ticket.  Then using the notches, I lined up the front and the back together.

Using a pair of scissors I trimmed up the edges and notched the other side of the ticket using the ¾" circle punch.

Then with the crop-a-dile, I punched out the word "BELIEVE" using the " hole punch.  To make sure that I was able to maintain the integrity of the holes, I printed out another ticket that had believe punched out of it.  Then printed it up and used a clip to hold the template together with the tickets.  Fortunately, I was able to do many tickets at once because I am not the conductor and it took A LOT longer to punch out.


As always, I've learned ways that could possibly give it a more completed look (according to me) and possibly make it a little easier for me.  A cute little project that will hopefully provide a little magic for a few years.

Thanks for looking!!
*´¨)
¸.•´¸.•*´¨) ¸.•*¨)
(¸.•´ (¸.•` ¤ Jamie*´¨)

Tuesday, December 29, 2015

Photo Christmas Ornaments 2015


For this simple project I started out with a few of the picture Christmas cards I had left on hand.  Using the 2¾" circle die from the Spellbinders Nestabilities Standard Circles, I positioned it over the picture of my children and ran it through my Big Shot.  I also cut out the sentiment from my card and added that to the backside.  The red cardstock was cut using the 3¼" circle die from the same Spellbinders set.


I glued all 3 pieces together and while the glue was still somewhat wet, gently rolled them to insert them into the opening of the clear plastic disc ornament.  Once the picture was in, I used my bone folder to gently flatten it and make sure the picture was flat to the cardstock.


It's a very simple project but one that the grandparents absolutely LOVED!  I'm already tossing ideas around in my head for what I can make for next year.  These are great personalized gifts and will be fun to reminisce in years to come.


Thanks for looking!!

*´¨)

¸.•´¸.•*´¨) ¸.•*¨)

(¸.•´ (¸.•` ¤ Jamie*´¨)

Sunday, December 22, 2013

Handmade Ornaments


Materials: Better than salt dough recipe, Christmas ornaments

With one of the snowy days we had recently, the kiddos and I decided we wanted to get creative!  Following this better than salt dough recipe, we got ready to have some fun.

After making the dough and letting it cool off, I cut the images we wanted using the cookie cutters.  The one I made for my furry baby, I used a heart and without much help from her, imprinted her paw into the dough.  We then put all the cut outs into the oven to bake.

Once they were out of the oven and cooled off, we got to painting.  Since the only paint I have in the house is a water based, kid friendly paint, that's what we went with.  I'm thinking that an acryllic paint would most likely work best.

We had A LOT of fun and now have some ornaments to hand out to family!! 


Thanks for looking!!
*´¨)
¸.•´¸.•*´¨) ¸.•*¨)
(¸.•´ (¸.•` ¤ Jamie*´¨)

Sunday, December 30, 2012

Winter Scene


Machine Used: BossKut Gazelle
Software: Funtime Scrapbooking III
Files Used: String of Lights by Judy Stark BKD 165, Bunny Silhouette by Karen Taglia 0341,
Materials: Card stock, embroidery thread, Glossy Accents, Mod Podge, fine glitter

For this project, I started out by following Terri's video on how to convert any digital coloring book page to a piecing or print & cut file.  I found a great site with some beautiful Christmas coloring pages and printed the page in the recommended PDF format.  Or you could right click on the image and save image as a PNG to your computer.  Either way, Funtime can import the image to create a cut file.  I just LOVE the fact that Funtime can import all sorts of file types including SVG, DXF, EPS, AI, PDF, images (JPG, BMP . . . ), and several others!!

Then I imported the Christmas House Coloring Page and used the auto vecto to create the cut file.  I changed the color of the lines so that when it came to cutting out specific colors I was only cutting out the shapes that I needed in each color.

Since this was a larger image, I duplicated the whole image and changed the pen style to the kiss cut.  I made sure to leave my outer most rectangle as the regular cut.  Doing this allows me to cut out the rectangle (in this case) and then leave the pattern to follow while I'm piecing my page together!  Love this tip, BIG thank to Terri for this one!!  Make sure to watch the entirety of the video shared above to see how easy this is to do.
 

Once all my pieces were cut out, I glued them onto my background.  I then mixed a small amount of some fine glitter with Mod Podge and "painted" it on to the snow.  It's just something to see freshly fallen snow when the sun is shinning that simply amazes me!!


Since you can't complete a winter scene without some adorable woodland creatures, I added in a couple of the Bunny Silhouette by Karen Taglia. Hey, bunnies are just for Easter!! ;o)  These little bunnies measure 0.477 by 0.363!  Very tiny and my Gazelle did an incredible job at some very clean cuts.

Using green embroidery thread, I outlined the house where I wanted to string the Christmas lights.  Then using the individual lights from the String of Lights by Judy Stark I cut some out and applied them to the string.  To give the light bulbs more dimension I added some Glossy Accent Tones.  How big are the light bulbs you ask?  Each one measures 0.139 by 0.217.  Once again, my Gazelle doesn't disappoint.  She cut each one beautifully!!


I wrapped a jump ring (usually used with making jewelry) with green embroidery thread for the wreath on the door.

I originally made this with the thought of if being a card but as I put more into it I've decided to frame it.  I had so much fun with this simple paper piecing that I'm already on the hunt for more coloring book pages that I can create with!!

Thanks for looking!!
*´¨)
¸.•´¸.•*´¨) ¸.•*¨)
(¸.•´ (¸.•` ¤ Jamie*´¨)
BossKut Design Team Member

For more projects and information, please click links below:
BossKut Gazelle Blog
BossKut Company Blog

Thursday, December 20, 2012

It's OK to Say Merry Christmas!


Machine Used: BossKut Gazelle
Software: Funtime Scrapbooking III
Files Used: Reindeer Cookie Holder by Judy Stark BKD 169
Materials: Heat Transfer Vinyl, Rhinestones

For this shirt I used the reindeer from the the Reindeer Cookie Holder by Judy Stark.  I just thought that he'd look so cute peeking out of a pocket of a shirt! 


I started with heat transfer brown vinyl for the head and used the beautiful heat transfer red glitter vinyl for the nose.  For the eyes, I applied 10ss cobalt rhinestones.  It was a VERY easy addition to a simple shirt that's perfect for the holiday season!!


This shirt is inspired by a pin I received a few years back and thought it would look perfect with some of that beautiful heat transfer glitter vinyl available through Boss Kut!!  Knowing that my Mom would love this shirt, I offered to make one for her too.

I started by typing out my text in Funtime.  For the top portion of the sentiment "It's OK to say" I wanted it to arch.  To do this I created an oval and selected both the sentiment and the oval.  Then from the top tool bar I clicked on "text" and then "fit text to path."  I made my selections in the next control panel that popped up and voila!!  Easily done.  :o)  For a much better tutorial on how to do this in Funtime, be sure the check out Jules tutorial!!

Once everything was as I wanted it, I set everything on my mat in Funtime as I wanted it to appear on the shirt.  I didn't cut it this way because that would waste A LOT of material but I'm a very visual person and it helps when lining everything up on the shirt.

Make sure when you cut your design that your vinyl is face up on your mat and the transfer material is on the mat.  Cut your design in reverse.  Funtime makes this really easy!  Once you've created your design, and you're ready to cut, go into the Cutting Control Panel.  Under "2. Advance Options" there's an option to "Mirror" your image, select it.  I also always select the "Weeding" option when working with vinyl.


Once everything was cut and weeded, I started at the top and ironed everything onto my shirt.  With this design there was 3 different things to iron on, the top sentiment, the nativity scene, and the bottom sentiment.  After the first one was ironed on, I made sure that the iron did NOT touch the vinyl that was already done.  I didn't want to over heat the vinyl and cause it to melt.

Directions:
•1. Cut design in reverse Note: Weed design carefully!
•2. Prepare heat press at 300 to 350 degrees F
•3. Press for 15-20 seconds with medium pressure (note: too much pressure will result in glitter baking off of transfer)
•4. Peel backing cold
Can be applied with a hot iron. Set the iron to cotton linen setting. No steam. Place a cover sheet, kraft paper, cloth etc. over transfer and heat for 15 to 20 seconds. Turn to inside of garment and heat again for 15 to 20 seconds. Be sure you test your fabric first.
Washing instructions:
Wash cool temperature. Turn garment inside out. Tumble dry up to 140 degrees.

Thanks for looking!!
*´¨)
¸.•´¸.•*´¨) ¸.•*¨)
(¸.•´ (¸.•` ¤ Jamie*´¨)
BossKut Design Team Member

For more projects and information, please click links below:
BossKut Gazelle Blog
BossKut Company Blog

Monday, December 17, 2012

Christmas Gift Card Holders


Machine Used: BossKut Gazelle
Software: Funtime Scrapbooking III
Files Used: Journaling Block 0411, Pop Kut Angel by Judy Stark BKD161, Snowman 0615, Penguin by Olivia Myers 0607,
Materials: Card stock, ribbon, glitter paper

Being a military family, we have family everywhere.  I have nephews in California and nieces in Japan.  I live in Michigan!!  I would much prefer to give gifts for my nieces and nephews to open on Christmas day, but unfortunately shipping costs can really put a strain on an already very budget conscious month.

That's leads me to this project.  I like to send gift cards so that they can go shopping at their favorite store!  Now, I can't just send a gift as impersonal as a gift card and NOT do something special!!  That would be a crafting crime and my Gazelle so loves the work.  :o)


Starting out in Funtime I created a very basic and simple card to hold my gift card.  Then using the true type font Honey Script, I typed out the names that I needed for each card and welded the letters together.  With the awesome feature to use ANY pen, I put a Sharpie in where the blade holder would go and let my Gazelle "cut" out the names for me!  I replaced the pen with the blade holder and then cut out the journaling block around the names.  Then I secured the name tag to the gift card holder with ribbon.


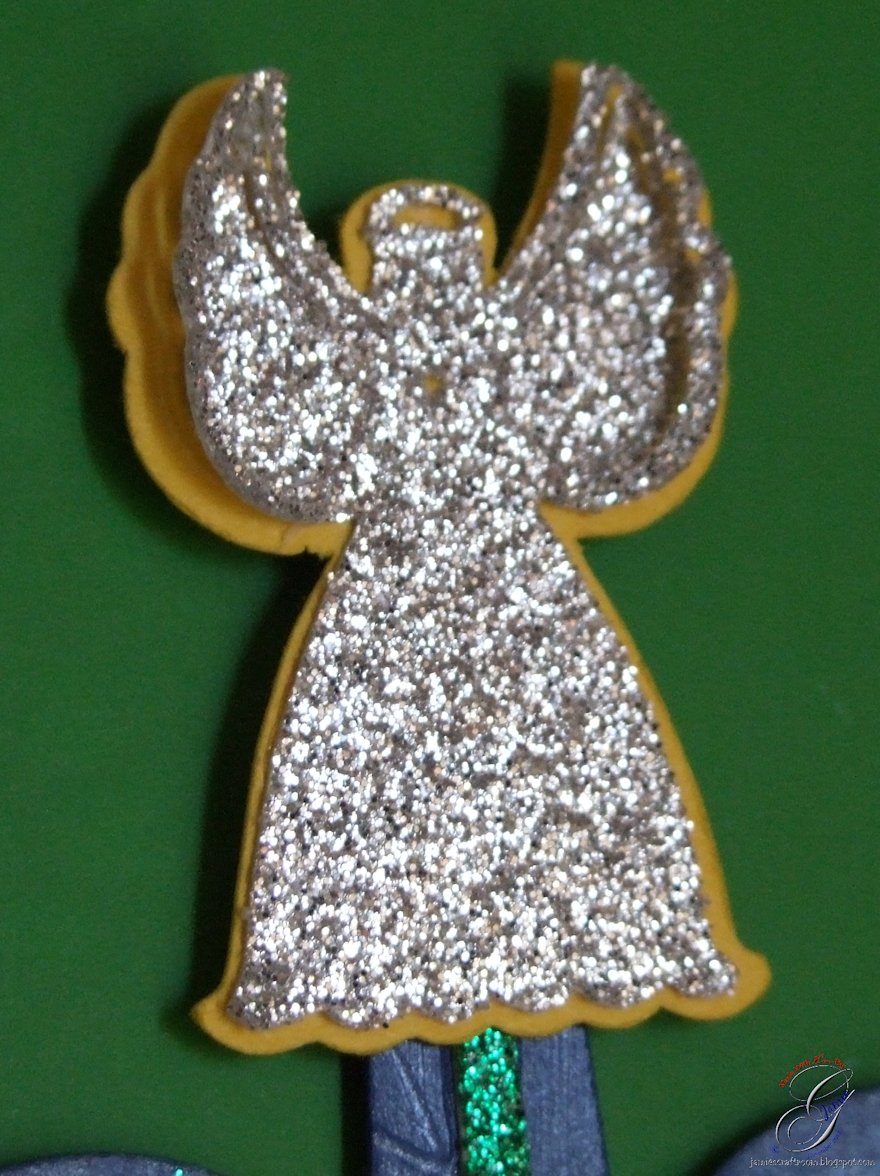
For my beautiful nieces, the Pop Kut Angel was the only one that I personally thought fit perfectly for them!  I added gold stickles around the halo and clear stickles for accents to her. 


For my handsome nephews I used the Snowman and Penguin.  For the whites of the snowmen and penguins I used a mixture of half white glue and half shaving cream for added texture.

With the snowmen I used the beautiful blue glitter paper, available at Boss Kut, for the scarf and the trim on the hat.


The penguins are decked out in their red glitter hat and scarf. To give those cute little cheeks a rosy glow, I used a Q-tip dipped in some ink and dabbed it on.


These 6 gift card holders are finally ready for some very special kiddos! Now, I just need to get to the store and get those gift cards.

Thanks for looking!!
*´¨)
¸.•´¸.•*´¨) ¸.•*¨)
(¸.•´ (¸.•` ¤ Jamie*´¨)
BossKut Design Team Member

For more projects and information, please click links below:
BossKut Gazelle Blog
BossKut Company Blog

Thursday, December 6, 2012

Christmas Countdown Frame


Machine Used: BossKut Gazelle
Software: Funtime Scrapbooking III
Files Used: Swirly Holiday Tree by Judy Stark BKD 166, Pop Kut Angel by Judy Stark BKD 161Santa Bag by Lisa Schmidt 0882D
Materials: 12 x 12 frame, card stock, glitter paper, vinyl

I remember fondly as a child when my Mom would make a countdown calendar by hand on index cards.  My brothers and I would take turns pulling of the day and watching the numbers get smaller.  I can still feel the excitement!!  :o)  While I sincerely appreciate all the hard work my Mom put into that, I decided that I would take a different route with the intentions of being able to provide for my children that same excitement.
 
For this project I started out with a very plain 12 x12 slate grey frame with a 5 x 5 opening for a picture and as any crafter knows, that just won't do!  For the top third, I added white vinyl and the bottom green vinyl.  To ease the transition from white to green vinyl, I added some red ribbon.


The numbers that countdown to Christmas are on a simple ornament that I created in Funtime using 2 basic shapes.  I started with a circle and a square that I had rounded the edges on.  After welding them together, I went into the special effects and added the charm feature.  Very simple and gave me exactly what I was looking for!

When I had one completed, I placed it in the lower left hand corner of my mat.  In the transformation box I multiplied the number of ornaments by 13 and selected the fill page option.  Before cutting, I ran a green sheet of card stock through my Xyron machine and laminated both sides of the card stock.  The reason I chose to do this was to give the ornaments more durability since my almost 4 year-old daughter and 2 year-old son will be "helping" me count down.  My Gazelle cut it like a dream!!


After layering the numbers in red and white card stock, I used a mixture of half white glue to half shaving cream for added dimension.  Once I had the "snow" on the numbers, I added some extra fine glitter for that fresh fallen look!  To complete the look, I added a couple strands of thin ribbon to the top.

I used the true type font SantasSleighFull Bold for "days until Christmas."  The green outline is cut from card stock and the red is cut from out door vinyl.  Once I layered it, I went along the outside of the red vinyl with a white extra fine Sharpie paint pen. 

The silhouette of Santa's sleigh I found during an online search for coloring pages.  After saving the image, I imported it into Funtime and created a cut file from it.  This image is only 3.5 inches wide and about 1.75 inches high!!

Due to the thickness of the numbers, I needed a place to store them.  My hooks just aren't big enough to accommodate all of them at once.  So, using the adorable Santa Bag, I started by cutting out the bag in red glitter paper and the top trim in simple white card stock.  The red glitter paper cut beautifully and there was absolutely no mess from glitter falling off!!

 
Using the same mix from the numbers, I added the fluffy white mixture to the top of the Santa bag and tied the top with some twine.  To make a box out of it hold the numbers, I simply cut out a rectangle that was about an inch wide and 5 inches long.  I scored it and folded it so that it would form a shelf with tabs on the sides to glue it to the bag and the frame.

The presents I added are scrap pieces of paper that I cut into small rectangles and then added some ribbon to it.


The beautiful Swirly Holiday Tree is a new release from BossKut.  After cutting the tree from the green glitter paper, I added it to the outline using Mod Podge for the glossy look.  I also decided to add a tree skirt by easily cutting out an oval from some patterned paper.

I chose to top my tree with the Pop Kut Angel.  She's absolutely gorgeous and I love how the pop kut wings gave added dimension to my frame.  This little beauty measures only 1.25 inches high and look just how well she cut out from the glitter paper!!


Thanks for looking!!
*´¨)
¸.•´¸.•*´¨) ¸.•*¨)
(¸.•´ (¸.•` ¤ Jamie*´¨)
BossKut Design Team Member

For more projects and information, please click links below:
BossKut Gazelle Blog
BossKut Company Blog

Tuesday, December 4, 2012

Winter Friends


Machine Used: BossKut Gazelle
Software: Funtime Scrapbooking III
Files Used: Santa and the Snowman coloring page
Materials: Card stock, Glossy Accents, Mod Podge, fine glitter
Challenges: The Outlawz Twisted Thursday - Anything Goes/Winter Friends Twist

I started this card by using a coloring book page that I found online.  I opened it up in my PaintShop Pro and started coloring.

In Funtime I typed out the text "Winter Friends" using the font Hobos available in Funtime.  I then created an outline and cut both out.  I added some Glossy Accent to the white of the sentiment.

Thanks for looking!!
*´¨)
¸.•´¸.•*´¨) ¸.•*¨)
(¸.•´ (¸.•` ¤ Jamie*´¨)

Thursday, November 29, 2012

A Fairy Christmas


Machine Used: BossKut Gazelle
Software: Funtime Scrapbooking III
Files Used: Fairy Poinsetta Digi Stamp by Make it Crafty, Christmas Corners 1 Digital Cutting File by Bird
Materials: digi image, card stock, red rhinestones, green pearls, stickles
Challenges: The Outlawz Paper a la Mode - Anything Goes

My first project including a digi image that I've "colored."  Now, I don't have the Copics or other similar types of markers so I used my Paint Shop Pro!

I did some research and looked for tutorials on how to color an image and then shaded it.  I did have a lot of fun learning something new and working with this image.  One of the things that I learned is that I'll need to be more dramatic when shading my images to achieve that POP that I see in so many beautifully colored images.


After I printed her out, I added some clear stickles to her beautiful wings.
 
For the holly border, I took one of the Christmas corners, copied 5 more of them in a circle and welded them together in my Funtime.
 
After cutting it out with my Gazelle I added some red rhinestones and silver stickles.

Thanks for looking!!
*´¨)
¸.•´¸.•*´¨) ¸.•*¨)
(¸.•´ (¸.•` ¤ Jamie*´¨)
Related Posts Plugin for WordPress, Blogger...