Showing posts with label Valentine's Day. Show all posts

Tuesday, June 3, 2014

Valentine's Day Bucket


Machine Used: BossKut Gazelle
Software: Funtime Scrapbooking IV
Materials: Plain bucket, Oracal 651 vinyl

I know, A LOT late in getting these posted.  I've been VERY neglectful in getting blog posts wrote up and pictures taken of my projects this year.  I made these for the WONDERFUL ladies that teach my children in their pre-school.
 
I wanted the names to be straight on the buckets.  In order to do that, I needed to figure out the dimensions of the cone that made the buckets.  Fortunately for me, my dearest hubby is an engineer and I could rely on him to teach me how to figure it out.  :o)  Here's what I used to figure out the arc for my writing.  I honestly don't remember where I got this from and wish that I could link to it directly.
 
 
It looks A LOT more difficult than it really is.  I liked the fact that I could cut the names in the arc, use transfer tape to maintain the integrity of the design, and it would be straight on the bucket.

Thanks for looking!!
*´¨)
¸.•´¸.•*´¨) ¸.•*¨)
(¸.•´ (¸.•` ¤ Jamie*´¨)

Thursday, February 14, 2013

Valentine's Card Boxes


Machine Used: BossKut Gazelle
Software: Funtime Scrapbooking IV
Files Used: Eyelet Scalloped Heart by Phyllis Parkins 0960
Materials: Card stock, embroidery thread, special treats

Here's a simple project that can be done in quantity and quality!  A simple design to make as many as you need or just a few in a short time.

The template for this card and gift box can be found in the Score, Fold, Create! The Ultimate Guide to Crafting With Scor-Pal on page 76.

The front of my box card is decorated with the eyelet scalloped heart.  I first used a white gel pen to write out the names of the recipients.  I LOVE the fact that you can place just about any pen into the Gazelle and have her "cut" out the names.  Makes it really easy to center the names!  I replaced the pen with the blade and cut the heart out around the names.

The eyelet scalloped heart was sized to 2.5 x 2.5, making those eyelets pretty small.  Those small holes made it perfect for threading embroidery thread.


I threaded some of the hearts different, mainly just because I wanted to see how they would all look.

I attached the hearts to the front of the box using pop dots for a little added dimension.

For the inside of the card, I choose to keep it simple by adding a hand written note.  The cutie Mickey and Minnie Valentines were available for free download.

I added some of our favorite treats and now these very simple Valentine's are ready for that very special someone!

Thanks for looking!!
*´¨)
¸.•´¸.•*´¨) ¸.•*¨)
(¸.•´ (¸.•` ¤ Jamie*´¨)
BossKut Design Team Member

For more projects and information, please click links below:
BossKut Gazelle Blog
BossKut Company Blog

Tuesday, February 5, 2013

Heart Explosion Card Funtime Tutorial


Machine Used: BossKut Gazelle
Software: Funtime Scrapbooking IV
Files Used: Heart file in Funtime, Scroll by Phyllis Parkins 0986
Materials: Card stock, ribbon

I was inspired to create a cut file from this video.  It's funny how you see a project that someone else has done and are then able to create a cut file in Funtime!  As always, there's a learning curve but once you start getting the basic concepts down nothing is off limits!

Once you've created your heart explosion, you can adhere it to the inside of card or simply a larger heart and use a ribbon to tie it shut.


This project utilizes basic shapes and the very basic alignment tools in Funtime.  With a few instructions you'll be well on your way to creating beautiful Valentine's cards for your family and friends!  Let's get started.

With a new 12 x 12 page open in Funtime start by clicking on your shapes button on the right of your screen.  Scroll to the heart and click on it.

This next step is more of a personal preference, I change the weight of the outside line to 0.003 and turn off the fill color.

With the heart selected, hit the "C" on your keyboard.  This will bring up your transformation box.  Select the width and enter in 4.8.  Why 4.8, because after playing with this multiple times and remaking it, that's what I found to work best.  :o)  For different looks don't be afraid to play around with sizes, you'll be amazed at what you'll create!


Note: By selecting the width you maintain the ratio of the heart.  If you were to select the Condense and then change either the height or width, it will only change that dimension and you'll lose the original shape of the heart.

Now we'll need a total of 4 hearts to create our heart explosion card.  There are several different ways to create more of the same heart.  What I did was select the heart, and hit Ctrl C on my keyboard and then Ctrl V.  This will place a duplicate heart in the lower left hand corner of your mat.  I moved my heart off the mat on the bottom.  Do this 2 more times for a total of 4 hearts.

So that you can see everything I'm working with, select the button at the bottom with the magnify glass and ALL.  This will zoom into the whole page with all your cut files.


To  make this easier in getting the hearts lined up where we want them, create a perfect square but selecting the draw rectangle button on the right of your screen and hold down Ctrl button on your keyboard at the same time.  At this point it doesn't matter how big it is because we are going to use the transformation box to resize it.

Select your square, and in the transformation box make sure that the square measures 8.5 x 8.5.

Let's start putting all this together now!!  Select one of the hearts, in the transformation box scroll down to rotation, and select it.  Change the angle to 45 degrees.


Select both the rectangle and the heart.  On the left of your screen is the justification, 4th button down.  Click on the align left AND the align top buttons at the top of your screen.

In order to maintain this justification as we work on the other hearts, group the square and the heart together.  Select shape at the top of screen, and then select group.


1 down and 3 more to go!  :o)  Select another heart and in the transformation box rotate it 135 degrees.  With the heart still selected, hold the shift key down and select the square.  With the justification selected again, align left, and align bottom.  With everything still selected, group them all together.

Select another heart, in the transformation box, rotate it 225 degrees.  Hey we're cooking now!!  With that heart selected, select the square and justify it by aligning it right and bottom.  Don't for get to group them together!

One more to go!!  Select the heart, in the transformation box, rotate it 315 degrees.  Justify the heart by aligning it right and top.


Now you should have all the hearts in the square and overlapping in places.  We only used the square for placement of the hearts and we now need to delete it.  With ALL items selected, select Shape at the top of the screen and click on Break all.

Select ONLY the square and delete it.


It's time to weld all the hearts together so that we can get the shape we need for the card.  Select all the hearts, and on the left of your screen select the weld button.  At this point you'll have several cut outs in the image.  It's up to you if you want to delete them or keep them there.  I kept mine because I personally like the way it looks when you open up the card.  If you do decide to keep them, I suggest selecting everything and grouping them together.


One last suggestion, create another heart the same size and keep this on the page when you save it.  That way in the future when you go to make something with this file, you'll have a starting point to making layers on your card.

Please be sure to stop by the Boss Kut Forum and share your creations!  We'd LOVE to see what you've done with this cut file!  Or if you have any questions, I would love to be able to help you maximize your use of Funtime and the Gazelle.

Thanks for looking!!
*´¨)
¸.•´¸.•*´¨) ¸.•*¨)
(¸.•´ (¸.•` ¤ Jamie*´¨)
BossKut Design Team Member

For more projects and information, please click links below:
BossKut Gazelle Blog
BossKut Company Blog

Wednesday, January 30, 2013

Wine Glass Lamp Shades


Machine Used: BossKut Gazelle
Software: Funtime Scrapbooking III
Files Used: Heart Doily by Phyllis Parkins BKD 092, Heart Doily by Judy Stark BKD 081,
Materials: Vellum, computer printer

I've seen lamp shades on wine glasses circulating on Pinterest and other craft blogs.  I immediately loved the look of them and knew that I had to create my own.  Seemed simple enough, until I decided to create my own cut file instead of importing an already existing template available.  I started with trial and error and ended with a lot more error.
 
I really wanted to be able to make my own cut file for the simple fact I wanted to be able to share that within the Boss Kut Forum and I wanted a custom fit for the specific wine glasses I was using.  With little success on my own, I commissioned my dearest husband for the math part that I was missing.  He figured out the size of the large circle, small circle, and how much I needed to cut away from it to create the size cone I wanted to end with.  He did explain it to me and I honestly tried to understand but I'm thinking that if I need help again I know just where to go.  :o)

These beautiful wine glass lamp shades would be perfect sitting out on the table for that romantic dinner.  With a battery operated tea light, these little shades are perfect to create a personalized dinner.
 
 
For the these 2 lamp shades, I used the embossing tool and embossing mat to emboss the vellum with the Heart Doily by Phyllis Parkins BKD 092 and the Heart Doily by Judy Stark BKD 081.  For both of these, I chose a lower force setting of 2 and did multiple passes (4) to get the look I wanted.
 
For the Heart Doily by Phyllis Parkins BKD 092 (pictured above on the right) I increased the size to match the size of the shade and cut it in quarters.  I only used 1/4 of the heart doily because I wanted to large swirls for this shade.
 
With the Heart Doily by Judy Stark BKD 081 (pictured above on the left) I used multiple copies of it at different sizes and just placed them over the lamp shade cut file in different places.  Another idea for this would be to emboss just the outside of the heart doily and then cut out the smaller pieces inside.  I think that it would make the lamp shade look like it was made from actual doilies.  Sometimes it's amazing what you see and can come up with after a project is complete!!
 
 
The lamp shade above was easily done using the scissors available in Funtime.  I had to start over with the cut file by creating the 2 circles.  With the largest circle, I chose the type of scissors I wanted and used the largest setting for the cut.  Then I multiplied that circle by 2 and changed the sizes.  I cut the circles in quarters and kept only 1/4 for my cut file.  I embossed the middle 2 and cut the shade.  This could be easily embellished with adhesive pearls, rhinestones, or whatever else you can think of.
 
 
I love the way text looks on vellum, just one of those things I guess.  For the shade above, I started in Funtime on my lamp shade file.  Then depending on how many lines of text I wanted on my shade I created that many circles, all various sizes.  I typed out the text and then fit the text to path.  After I had all the text typed out, I grouped it all together and mirrored the image.  I did this because I think that having the text printed on the "back" of the vellum gives it a softer appearance.  After doing that it completely displaces the text on the shade, so I had rotate the text back to the original placement.

My children will be with their grandparents this year for Valentine's Day, so I wanted to make something that they would enjoy from us.  For my 2 1/2 year-old son, I made the shade with the alphabet with the "I" "O (replaced with a heart)" and "U" for him to enjoy at dinner.  My 4 year-old daughter will enjoy the one with the song "You Are My Sunshine" on it.  She absolutely loves to sing that song.  My parents have assured me that they will put those out on the dinner table for my babies. 

While I tell my family I love them frequently, I love celebrating Valentine's Day.  I love making sure they know just how very much I do love them and how very special they are to me.

Please be sure to check out the Boss Kut Forum for the wine glass lamp shade and if you have any questions please feel to post a question or private message me and I'll be happy to help you personalize your lamp shade!
 
Thanks for looking!!
*´¨)
¸.•´¸.•*´¨) ¸.•*¨)
(¸.•´ (¸.•` ¤ Jamie*´¨)
BossKut Design Team Member

For more projects and information, please click links below:
BossKut Gazelle Blog
BossKut Company Blog

Saturday, January 26, 2013

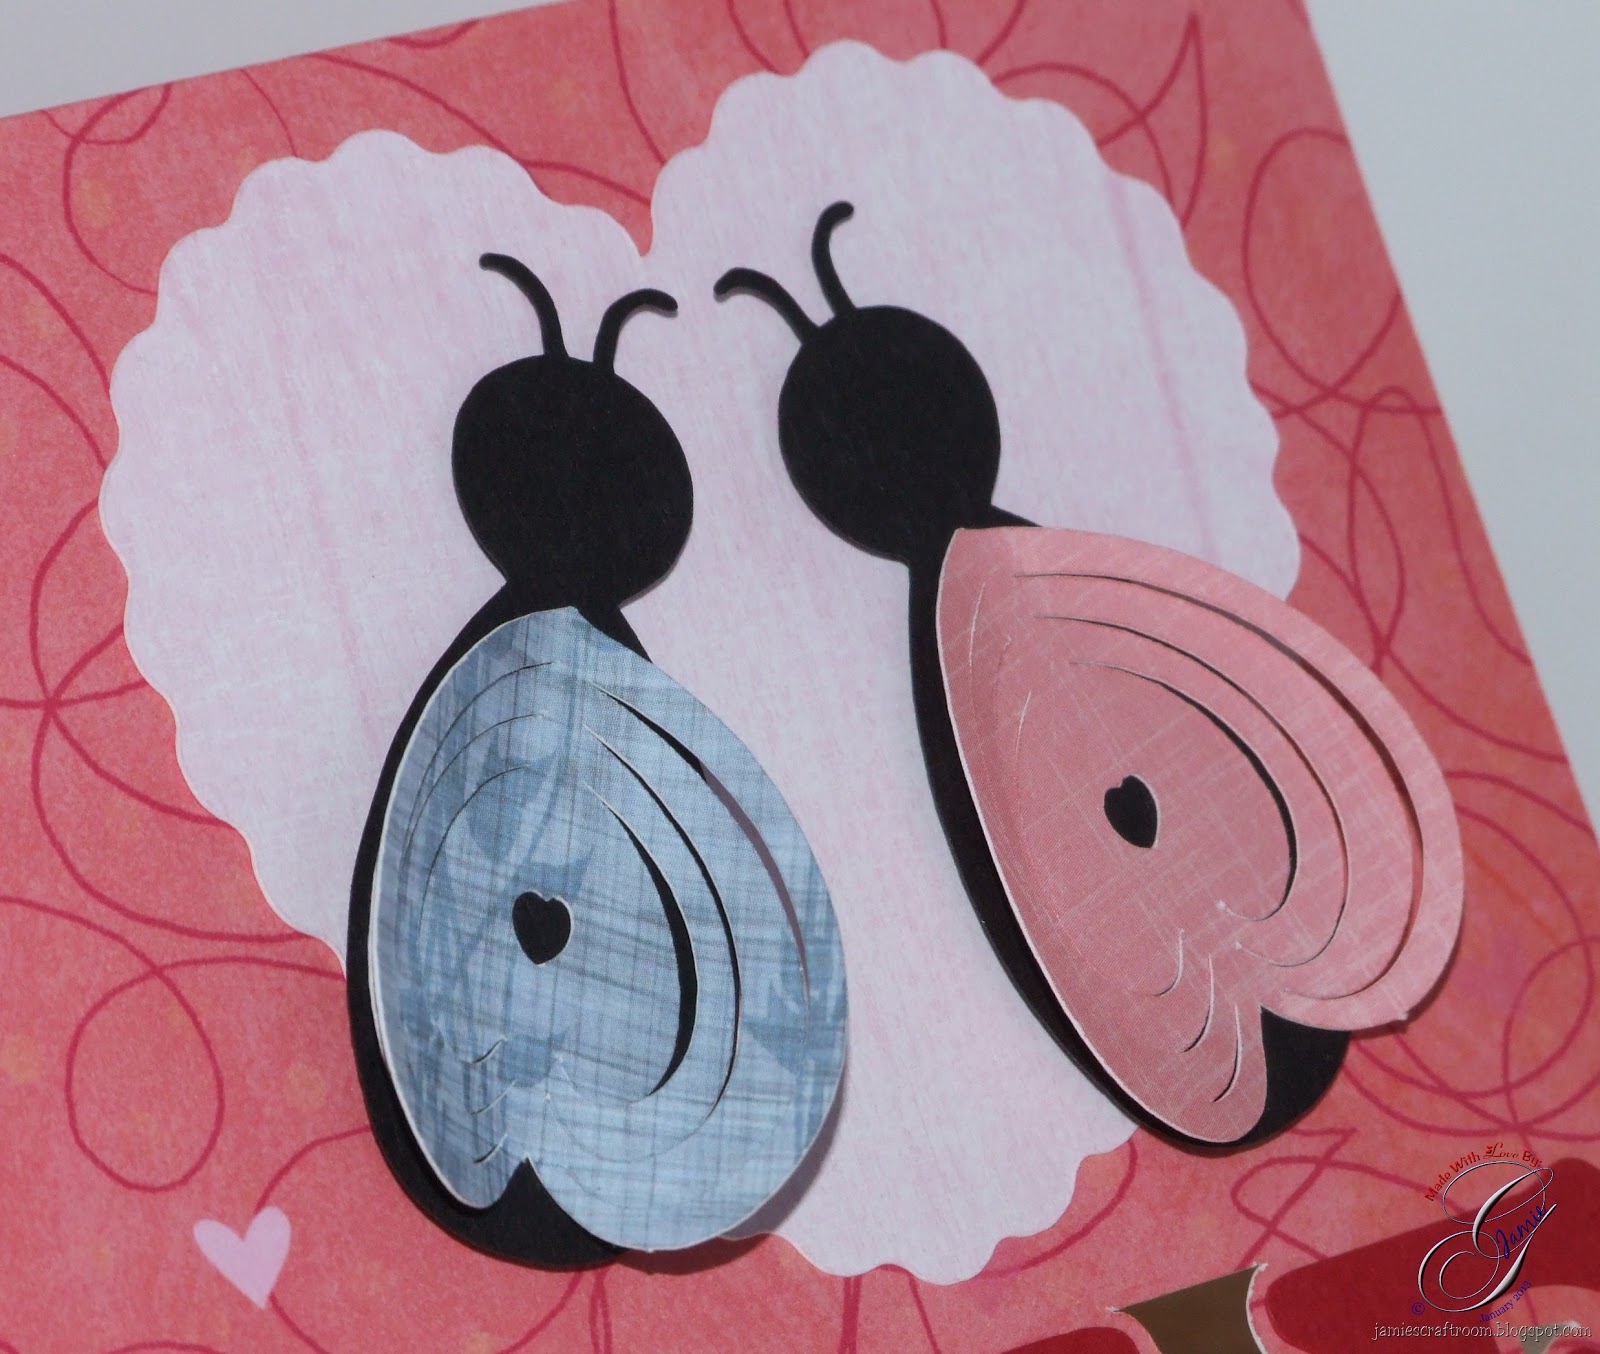
Love Bug Card


Machine Used: BossKut Gazelle
Software: Funtime Scrapbooking IV
Files Used: PopKut Love Bug by Judy Stark BKD 080
Materials: Cardstock, ribbon
Challenges: The Outlawz Paper ala Mode - Anything Goes

This project was complete because of a request that I to make a tutorial on how to weld letter to a card base.  After creating the tutorial and making the cut file I just had to make one!  :o)


The heart behind the love bugs I created in Funtime by using the scissor feature on a heart that was already available.

Those adorable little love bugs are available through Boss Kut Designs.  ADORABLE!!

 
Thanks for looking!!
*´¨)
¸.•´¸.•*´¨) ¸.•*¨)
(¸.•´ (¸.•` ¤ Jamie*´¨)

Saturday, February 4, 2012

Valentine's Day Gift Boxes


Machine Used: Boss Kut Gazelle
Software: Funtime Scrapbooking III
Files Used: Pillowbox (available through Gazelle Owner's forum), tag (available in Funtime Blue Book), popkut love bug (available for purchase at Boss Kut Die Cuts)
Materials: Cardstock, pens, eyelets, ribbon

I made these for my baby girl, the lovely little ladies in her dance class, and her wonderful instructor.  With Funtime I opened up the pillow box file and using the text feature typed a girls name in Fiolex Girls font (which I had previously downloaded from dafont.com), then welded the letters together.  Then with my Gazelle I used a Sharpie pen in place of the blade holder and "cut" the names.  I replaced the blade holder and cut out the pillow box.

Once I removed each of the pillox boxes from the mat, I had to finish coloring in the letters with my pen.  The Gazelle is capable of filling in empty spots with the engraving feature but for me, it was just easier to do it on my own afterwards.

I then embellished the box with some ribbon and the adorable little love bug.


Again using the ability to use any pen, I choose a thinner pen to write the sentiment, "Happy Valentine's Day.  From, Mickaela" in the Funtime font Architec on a tag available in the Blue Book in Funtime.  I "cut" the sentiment out and then the tag around it.  Using the same paper as the wings on the love bug, I added a strip to the top of the tag and finished it off with some thin white ribbon.


I added an eyelet to the side flap of each of the pillow boxes and threaded the ribbon through it.  Now all we need to do is go get some goodies to fill each of the boxes!!

Thanks for looking!!
*´¨)
¸.•´¸.•*´¨) ¸.•*¨)
(¸.•´ (¸.•` ¤ Jamie *´¨)

Friday, January 13, 2012

Be Mine Heart Bag

I found this project in my February 2012 Parents magazine and thought that it looked like fun.  I got the basic heart shaped bag design and then added "Happy Valentine's Day," the hearts, and the woman and man kissing.

Machine Used: Boss Kut Gazelle
Software: Funtime Scrapbooking III
Materials: Cardstock, ribbon, eyelets, glitter glue


Thanks for looking!!

Wednesday, January 11, 2012

Valentine's Day Bags and Boxes

In order to get myself familiarized with some of the features available on my Gazelle I made 3 different boxes.

Machine: Boss Kut Gazelle
Software: Funtime Scrapbooking III
Materials: Cardstock, Ribbon, Red Pen

With this first bag I used the option to use a pen to write the sentiments, "I Love You", "Sweetheart", and "Be Mine."  Then I swapped the pen for the blade and cut the heart out around the sentiment and attached them to the bag.  I tied the ribbons on as handles and put the bag together!

This next box I used the print and cut feature.  Using an image that I already had on my computer, I imported it into Funtime.  I put a heart around the bear and using the decorative scissors created a scalloped border.  I then sent the image to my printer and printed out the bear.  I put the print out of the bear on my cutting board and sent the scalloped heart to be cut.  I embellished the box with a little bit of white ribbon and here ya go!

With the pillow box I typed in a name for personalization and then cut it.  I used clear plastic on the inside so that any candy inside could be seen through the name.  Then with a little bit of ribbon I decorated the top and bottom.  Easy and fun!

Thanks for looking!!
Related Posts Plugin for WordPress, Blogger...