Machine Used: BossKut Gazelle
Software: Funtime Scrapbooking III
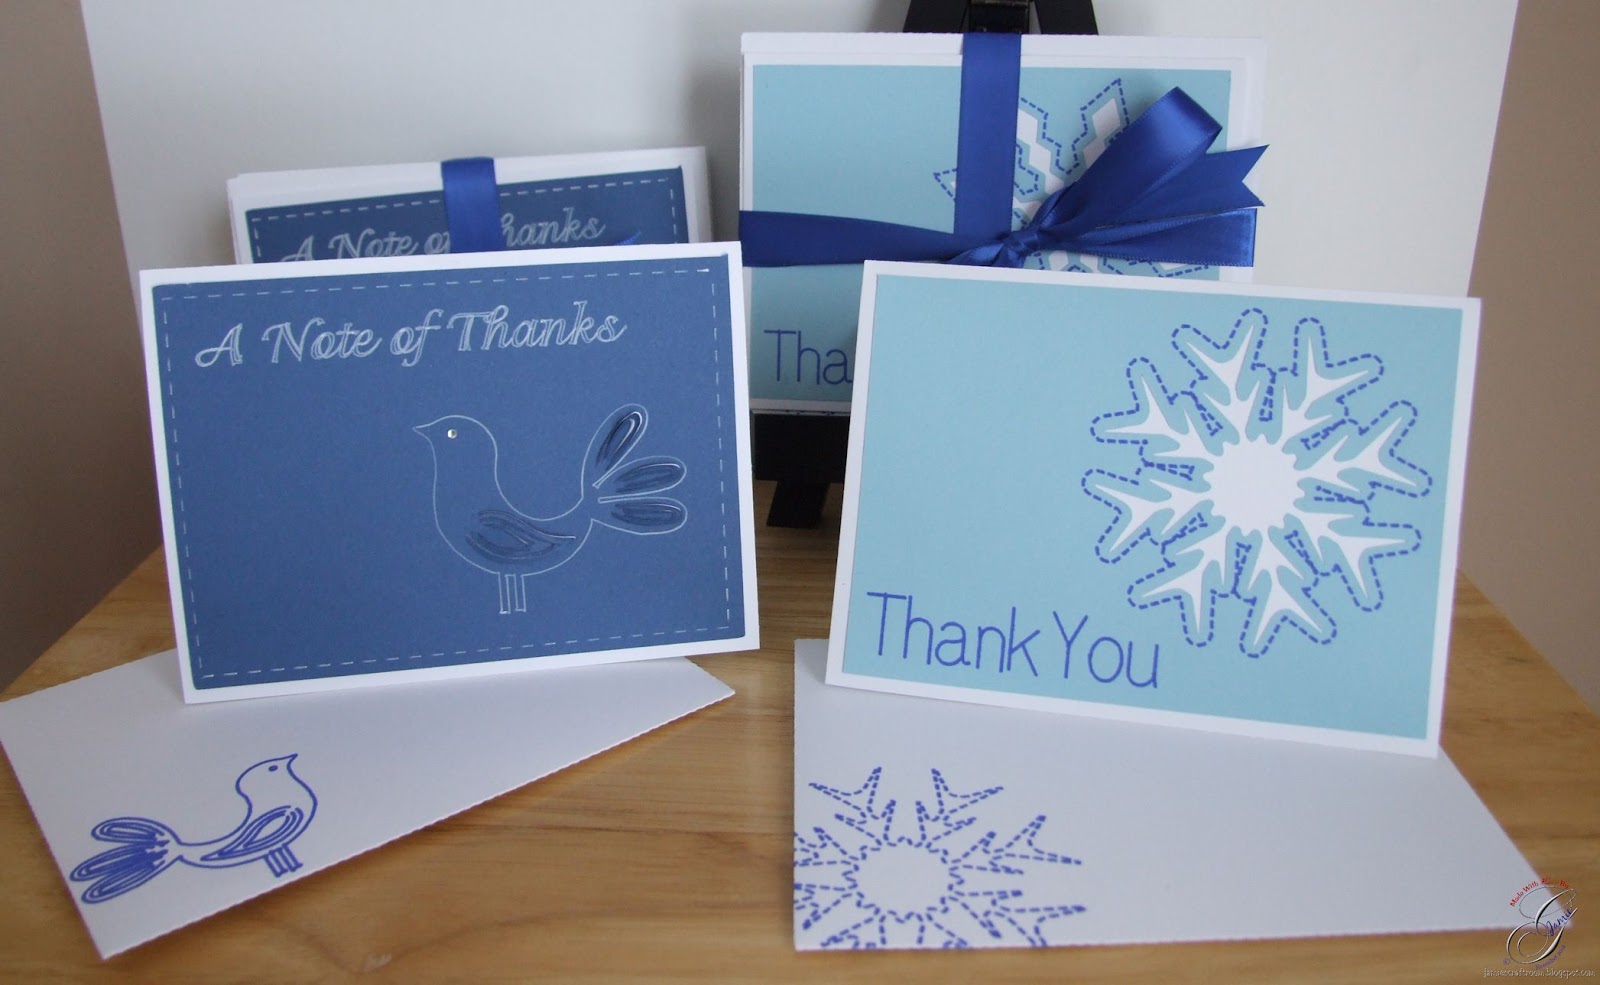
Files Used: Layering Snowflakes by Debbie Grommet BKD 078, Sassy Bird Pop Kut 0421
Materials: Card stock, Pen of choice, rhinestones
- Keep the card design CAS (clean and simple) so that I could easily make lots of them as needed.
- With the simplicity of the design, I could give sets to family and friends as gifts no matter their taste.
Using a blue Sharpie pen, I let my Gazelle "cut" out the sentiment and the outline of the snowflake. I replaced the pen with the blade and let my Gazelle cut out the snowflake and the rectangle. I attached the light blue paper to a white card base and simple enough.
The envelope was just as easy. I created the envelope cut file in Funtime and positioned the matching snowflake where I wanted it. Again using the blue Sharpie I "cut" out the snowflake and changed back to the blade to cut and score the envelope.

For the thank you card set with the pop kut sassy bird, in Funtime I choose 2 colors to work with. This made it easy when it came to cutting my project and to differentiate between what I was actually cutting and what I was "cutting" with my pen.
I started by creating 2 rectangles and centering them. The inner rectangle I changed the line to a kiss cut line and made sure that the rectangles had 2 different colors. For the sentiment and the outline of the bird, I made sure to make them the same colors as the kiss cut on the smaller rectangle.
Once I had everything laid out as I wanted it, I inserted a white gel pen into my Gazelle and "cut" the kiss cut rectangle, the sentiment, and the outline of the bird. I exchanged the pen with the blade holder and cut out the rectangle and the wings, and the tail feathers of the bird.
I just loved the way the white gel pen created a perfect faux stitching effect on the rectangle!
As with the previous envelope, I created the cut lines and then placed the bird I wanted it. I "cut" the bird out using a blue Sharpie and then the larger rectangle.

The picture below shows the 2 different kiss cut options available in Funtime. You can easily access these by selecting the line that you would like to change, then select Setting > Brush / Pen. Keep in mind that the next line you create will be the last pen option you choose.

Thanks for looking!!
*´¨)
¸.•´¸.•*´¨) ¸.•*¨)
(¸.•´ (¸.•` ¤ Jamie*´¨)
BossKut Design Team Member
For more projects and information, please click links below:
BossKut Gazelle Blog
BossKut Company Blog
What beautiful cards, and would be perfect as just 'winter' cards too. Wow, you did some fine work with that machine. I have a Silhouette and a Cricut expressions. Don't really know how to use either one of them! Wanted to say a Happy New Year and I'm looking forward to seeing all the lovely creations you share in 2013. Hugs
ReplyDeleteOh blue..my favorite color. I love CAS when it comes together like this. Very nicely done!
ReplyDeletexo
Judy