One of my all time most favorite movies is without a doubt The Polar Express. This project is, of course, inspired from that very movie. Wanting to keep the magic alive for as long as possible, I created these tickets and gave them to my children.
After a little search on the wonderful world wide web, I found a beautiful printable ticket. I printed it out on photo paper. Then on one side of the front and back, using a ¾" circle punch to add in a notch. The reason I only did one was to make it easier to line the front and back together.
Using my Xyron Creative Station, I put permanent adhesive on the front and the back copies of the
ticket. Then using the notches, I lined up the front and the back together.
Using a pair of scissors I trimmed up the edges and notched the other side of the ticket using the ¾" circle punch.
Then with the crop-a-dile, I punched out the word "BELIEVE" using the ⅛" hole punch. To make sure that I was able to maintain the integrity of the holes, I printed out another ticket that had believe punched out of it. Then printed it up and used a clip to hold the template together with the tickets. Fortunately, I was able to do many tickets at once because I am not the conductor and it took A LOT longer to punch out.
As always, I've learned ways that could possibly give it a more completed look (according to me) and possibly make it a little easier for me. A cute little project that will hopefully provide a little magic for a few years.
Thanks for looking!!
*´¨)
¸.•´¸.•*´¨) ¸.•*¨)
(¸.•´ (¸.•` ¤Jamie*´¨)
For this simple project I started out with a few of the picture Christmas cards I had left on hand. Using the 2¾" circle die from the Spellbinders Nestabilities Standard Circles, I positioned it over the picture of my children and ran it through my Big Shot. I also cut out the sentiment from my card and added that to the backside. The red cardstock was cut using the 3¼" circle die from the same Spellbinders set.
I glued all 3 pieces together and while the glue was still somewhat wet, gently rolled them to insert them into the opening of the clear plastic disc ornament. Once the picture was in, I used my bone folder to gently flatten it and make sure the picture was flat to the cardstock.
It's a very simple project but one that the grandparents absolutely LOVED! I'm already tossing ideas around in my head for what I can make for next year. These are great personalized gifts and will be fun to reminisce in years to come.
I know I'm late in getting this posted but with 2 young children on Spring break, I didn't have a whole lot of time. :o)
For this very simple project, I simply cut out the images I wanted to use and we used those as stencils on the pavement.
We ended up decorating the complete sidewalk in front of our house!
During our coloring, we discovered that when we rubbed the chalk into the cement after we went over the stencil that we were able to obtain a better image and the colors blended together.
We received MANY compliments on our colorful and creative sidewalks while people were out walking. :o)
We had so much fun with this images that we're looking forward to making more for Memorial day! Be sure to check out the other beautiful designs at Bosskut!!
Thanks for looking!!
*´¨)
¸.•´¸.•*´¨) ¸.•*¨)
(¸.•´ (¸.•` ¤Jamie*´¨)
With the help of the WONDERFUL ladies at the BossKut Forum I was finally able to learn how to use the intersect tool in Funtime to put words into a shape!
Now I've always wanted to be able to do this but wasn't even sure where to start. When I found this video on YouTube (Text to Heart Shape) I just knew that this could also be easily accomplished in Funtime.
After playing with it on my own for a bit and having some success I began to wonder if there was an easier way. With that, I went to BossKut Forum to seek help from the awesome and talented Terri and Jules. Now with the knowledge that they've armed me with, I'm here to share with you a tutorial on how to create these fun images! First, here's my first ever attempt at a video.
Now for the written explanation. In Funtime, I start with a 12x12 work surface. On the right, select SHAPES and scroll down to the full heart that is available. Remove the fill color and change the line thickness to 0.003. Size the heart as large as you'd like and what makes it easiest for you to work with.
Then select FONT, click on True Type, and choose a font you'd like to work with. In this case, I used the IMPACT font. Type "FAMILY" (all in capital letters) and click OK.
Size "FAMILY" so that it extends just over the heart on the left and the right. With just "FAMILY" selected, in the upper left, select TEXT, then CONVERT TEXT TO PATH. This will allow you adjust each letter individually. A good thing to keep in mind at this point, when you converted the text to path, that also made each cut in the middle of the letters, like the "A" a separate cut as well.
Before going any further it is a good idea to select the inner and outer cut of the "A." Once both are selected, group them together so that when you go to adjust the "A" in the heart, you maintain the integrity of the "A."
At this point I usually start working the letter that I would like centered in the heart. For this example I'm going to start working with the "M." Selecting just the "M", I move it to the center of the heart and readjust the size by clicking and dragging on the points just outside the letter. It's important to make sure that the top and the bottom of the "M" is just outside the heart in some places. I'm not worried about the overlapping letters or the spacing. I'm simply working on the "M" and it's placement. Once I'm happy with the "M" I will work on the other letters to get them where I want them.
Now that I'm good with the "M", I work on the letters, making sure that they are also extended past the heart at the tops and bottoms.
For the next part it'll be easier to see the construction points of each of the letters so that we can continue to extend them past the heart. To do this, first select the C at the bottom of Funtime with the dots on it. Then on the left of the screen select the move point tool.
Then select a construction point on the "F" and extent past the heart. When I do this part, I choose the points of the letters and keep the line as straight as possible to maintain the integrity and identity of each letter.
I continue this with each letter until they have all been completed and it will look something like this when you are done:
Once you're happy with how each letter looks extended past the heart, click on the C at the bottom of Funtime to hide the construction points again.
Make sure to select everything, the heart and all the letters. At the top of the screen select, TOOLS and then INTERSECTION.
Once again, select everything and group them together. This will help in maintaining the image when/if you decide to resize it.
Make sure to save all your hard work!
I hope that was easy to follow and the that video helped. As always, if you have any additional questions, please feel free to contact me!
Thanks for looking!!
*´¨)
¸.•´¸.•*´¨) ¸.•*¨)
(¸.•´ (¸.•` ¤Jamie*´¨)
Machine Used: BossKut Gazelle Software: Funtime Scrapbooking IV Fonts Used: Funtime Hobos Materials:Heat Transfer Vinyl
We recently moved and because of the move my daughter had to relocate schools. This month her new school has been celebrating reading with a different theme each week. This week is centered around her school.
She's supposed to wear cloths that support the school. Unfortunately for us, the PTO sold shirts at the beginning of the school year and don't have any more. Well, I couldn't send her to school without some school gear and colors!!
After playing around in the Funtime program, I came up with a couple of designs. I asked family and friends which one they liked best but ultimately it was up to my daughter.
She picked the blue design because it was easier for her to read.
While she was at school one day I cut the image and ironed it onto the shirt that we got for her. Fortunately she LOVED it!
Thanks for looking!!
*´¨)
¸.•´¸.•*´¨) ¸.•*¨)
(¸.•´ (¸.•` ¤Jamie*´¨)
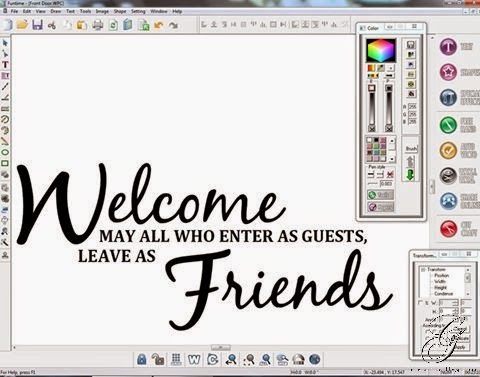
I've seen this sentiment or something similar used and have always loved the welcoming feel of it. Most times it is made with indoor vinyl and placed inside but I wanted to decorate our boring white front door.
Using my Funtime program, I created the sentiment and positioned it how I wanted it placed. With Funtime, this project is really very simple and took little time to complete.
After cutting the vinyl in black outdoor vinyl, I weeded the negative space off and placed transfer tape on it. I eyed the center as best I could and put it on the front door.