Showing posts with label Greeting Cards. Show all posts

Wednesday, May 1, 2013

Sweet Ice Cream Card


Machine Used: BossKut Gazelle
Software: Funtime Scrapbooking IV
Files Used: Ice Cream Cone by Judy Stark BKD 108, Card Band Lace by Judy Stark BKD 093
Materials: Card stock, crystal accents, self adhesive pearl brads

We're still waiting here in Northern Michigan for the local ice cream shoppes to open but that doesn't mean I'm not counting down the days!!  This sweet little Ice Cream Cone by Judy Stark BKD 108 sets the right mood for my desire of the warm sunny days.


For the cone, I inked the edges and used a VersaMarker to trace the inside cuts.  I wanted to make sure to bring out the beautiful details that were made for this file!  I added some clear accents to the chocolate on top of my cone to give that candy coated feeling.

 
In addition to the ice cream cone, there's this print n cut that comes with it!  When picking out my papers for this card, I centered them around it.
 

I made sure that add the Card Band Lace by Judy Stark BKD 093 to help transition between the bottom patterned card stock and the top pink.

Thanks for looking!!
*´¨)
¸.•´¸.•*´¨) ¸.•*¨)
(¸.•´ (¸.•` ¤ Jamie*´¨)
BossKut Design Team Member

For more projects and information, please click links below:
BossKut Gazelle Blog
BossKut Company Blog

Tuesday, April 9, 2013

Stampin' Up! Workshop 4-12-2013 Make 'n' Take


This will be the card that we'll be making at my first workshop.  These make 'n' takes are very simple and require minimal amount of product!


This first card I chose to use the Rich Razzleberry Classic Stampin' Pad for the image and the Old Olive Classic Stampin' Pad for the sentiment.

 
This card I used the Old Olive Stampin' Write Marker and Rich Razzleberry Stampin' Write Marker for the image and again, the Old Olive Classic Stampin' Pad for the sentiment.

What you'll need to create these beautiful cards:

Paper:
Whisper White 8 1/2" x 11" Card Stock
Old Olive 8 1/2" x 11" Card Stock
Rich Razzleberry 8 1/2" x 11" Card Stock
Designer Series Paper Patterns Stack - Brights Collection

Stamps:
Perfectly Penned - Clear Mount Stamp or Wood Mount Stamp
Thoughts & Prayers - Clear Mount Stamp or Wood Mount Stamp

Ink:
Old Olive Classic Stampin' Pad
Old Olive Stampin' Write Marker
Rich Razzleberry Classic Stampin' Pad
Rich Razzleberry Stampin' Write Marker

Don't forget these stampin' essentials to keeping your stamps clean and in top shape:
Stampin' Scrub
Stampin' Mist

Thanks for looking!!
*´¨)
¸.•´¸.•*´¨) ¸.•*¨)
(¸.•´ (¸.•` ¤ Jamie*´¨)
Independent Stampin' Up! Demonstrator

Monday, March 18, 2013

My First Card Class


I haven't been much into stamping but when the New Year was approaching I was beginning to look at ways to expand my craft and to learn new things.  This brought my attention to the many beautiful creations I've seen others make using Stampin' Up products.
 
I found a wonderful Stampin' Up Demonstrator in my area and have had the opportunity to bombard her with all of my questions.  She's been absolutely WONDERFUL in explaining things and helping me out!  Be sure to check out Lisa's blog at Chocolate Chip Stamping or her Facebook page!
 
Here are the cards that I put together at her March card class.
 
** All cards were designed by her and I simply assembled them. ** 


Maybe not the cleanest stamping but I'm learning!!  :o)  We've all got to start somewhere and I usually jump in both feet and figure it out from there.  Not always the wisest choice but when it comes to my crafting, I don't want to hesitate for fear of missing out on something GREAT!!

Thanks for looking!!
*´¨)
¸.•´¸.•*´¨) ¸.•*¨)
(¸.•´ (¸.•` ¤ Jamie*´¨)

Sunday, March 10, 2013

Bible Easel Card


Machine Used: BossKut Gazelle
Software: Funtime Scrapbooking IV
Files Used: Cross by Karen Taglia 0344, Dove with Scroll by Karen Taglia 0397, Open book available in the Bluebook in Funtime
Materials: Card stock, black glitter heat transfer vinyl, ribbon
Challenges: The Outlawz - Twisted Thursday Bingo Card

I started with using the book cutting file available in the Funtime Blue Book minus the actual pages that I needed for the book.  Don't forget to check out all those cut files that came with your Gazelle!!

The reason for not cutting out the pages yet is because I wanted to give my book a dimensional look and decided that adding more pages would help to achieve that.  Using a fantastic new feature in the Funtime IV software, I was able to increase the size of the pages by percentage!!  For this particular application, it makes it so much easier because the 2 pages of the book that I'm dealing with are different sizes by an odd number.

I re sized my book to 5 X 7 by using the Condense option in the Transformation box.  Fortunately with this particular cut file, by condensing it instead of maintaining the ratio it didn't noticeably distort the image.  I simply chose to do this because it made it easier to assemble a A7 envelope for mailing instead of creating a whole new envelope.  :o)

Now that my book is the size I'd like, I select the image and at the top under Shape, select Break all.  This gives me the ability to select the individual pages.  I chose to make a total of 4 pages (for each side) for my book.  Selecting each of the pages, make an additional 3 copies.

There was no magic in deciding the sizes of each of the layered pages.  I just picked a percentage I thought that work well and went with it.  So, keeping that in mind the top page will remain the size that was created when I condensed my whole book to 5 X 7.  Each page after increases by 2.5%.

 
At this point you will definitely need the transformation box up and have either the Width or Height selected.  Select the second page, in the transformation box I selected Width, then click on the box next to the percentage sign.  Next to the W.: type in 102.5 and hit the Apply button.  You'll notice that once you've selected Apply, the numbers in the boxes will revert back to the measurements instead of the percentage.


The third page I increased by 105% and the final was increased by 107.5%.

I cut out the 2nd, 3rd, and 4th pages and shaded them with some ink.  For the first page I typed out and printed some of the NIV Bible from Mark 16 onto the top pages and cut out the pages around it.  I also added some ink to the edges of the first page.

For the place marker ribbon, I ironed on "He is Risen" using the beautiful black glitter heat transfer vinyl.  Using the video by Terri, Vertical Text, I typed out the sentiment vertically, spaced it to my liking, and then centered it.  Remember when you are working with heat transfer vinyl to cut the vinyl and NOT the backing.  When you go into the cut menu, make sure to "Mirror" your sentiment and "Weed" it.

To hold up my book I took 2 of the Dove with Scroll by Karen Taglia 0397 and welded them together.  I glued down the scroll to the base of the card and scored the doves so that they would stand up, supporting the book.


I cut the scrolls out in 110 lb card stock, which by the way my Gazelle cut out beautifully!!  Check out those clean cuts.  Using several different colors of ink pads, I dabbed the scroll to give it a speckled look.


Using the same technique with the inking, I inked the Cross by Karen Taglia 0344 and applied a self adhesive maroon pearl to the center.
 
 
I hope that this project has inspired you to create something beautiful with the Boss Kut Designs and to check out the wonder new features available with Funtime IV!
 
Thanks for looking!!
*´¨)
¸.•´¸.•*´¨) ¸.•*¨)
(¸.•´ (¸.•` ¤ Jamie*´¨)
BossKut Design Team Member

For more projects and information, please click links below:
BossKut Gazelle Blog
BossKut Company Blog

Thursday, February 7, 2013

Thank You Cards


Machine Used: Fiskars Fuse
Files Used: Scalloped Circle Die
Materials: Card stock, rhinestones, ribbon

This is the card that my daughter and I worked on together.  We sent these out to those who gave her a birthday present.  This was the first card I made utilizing my new Fuse.  I inked the die and my daughter turned the crank.  She's only 4 and it was easy enough for her to help!  LOVE THAT!!

 
My daughter helped me pick out all the papers and we layered them together.  I really like the fact that she enjoys helping me make her thank you cards.

Thanks for looking!!
*´¨)
¸.•´¸.•*´¨) ¸.•*¨)
(¸.•´ (¸.•` ¤ Jamie*´¨)

Saturday, January 26, 2013

Love Bug Card


Machine Used: BossKut Gazelle
Software: Funtime Scrapbooking IV
Files Used: PopKut Love Bug by Judy Stark BKD 080
Materials: Cardstock, ribbon
Challenges: The Outlawz Paper ala Mode - Anything Goes

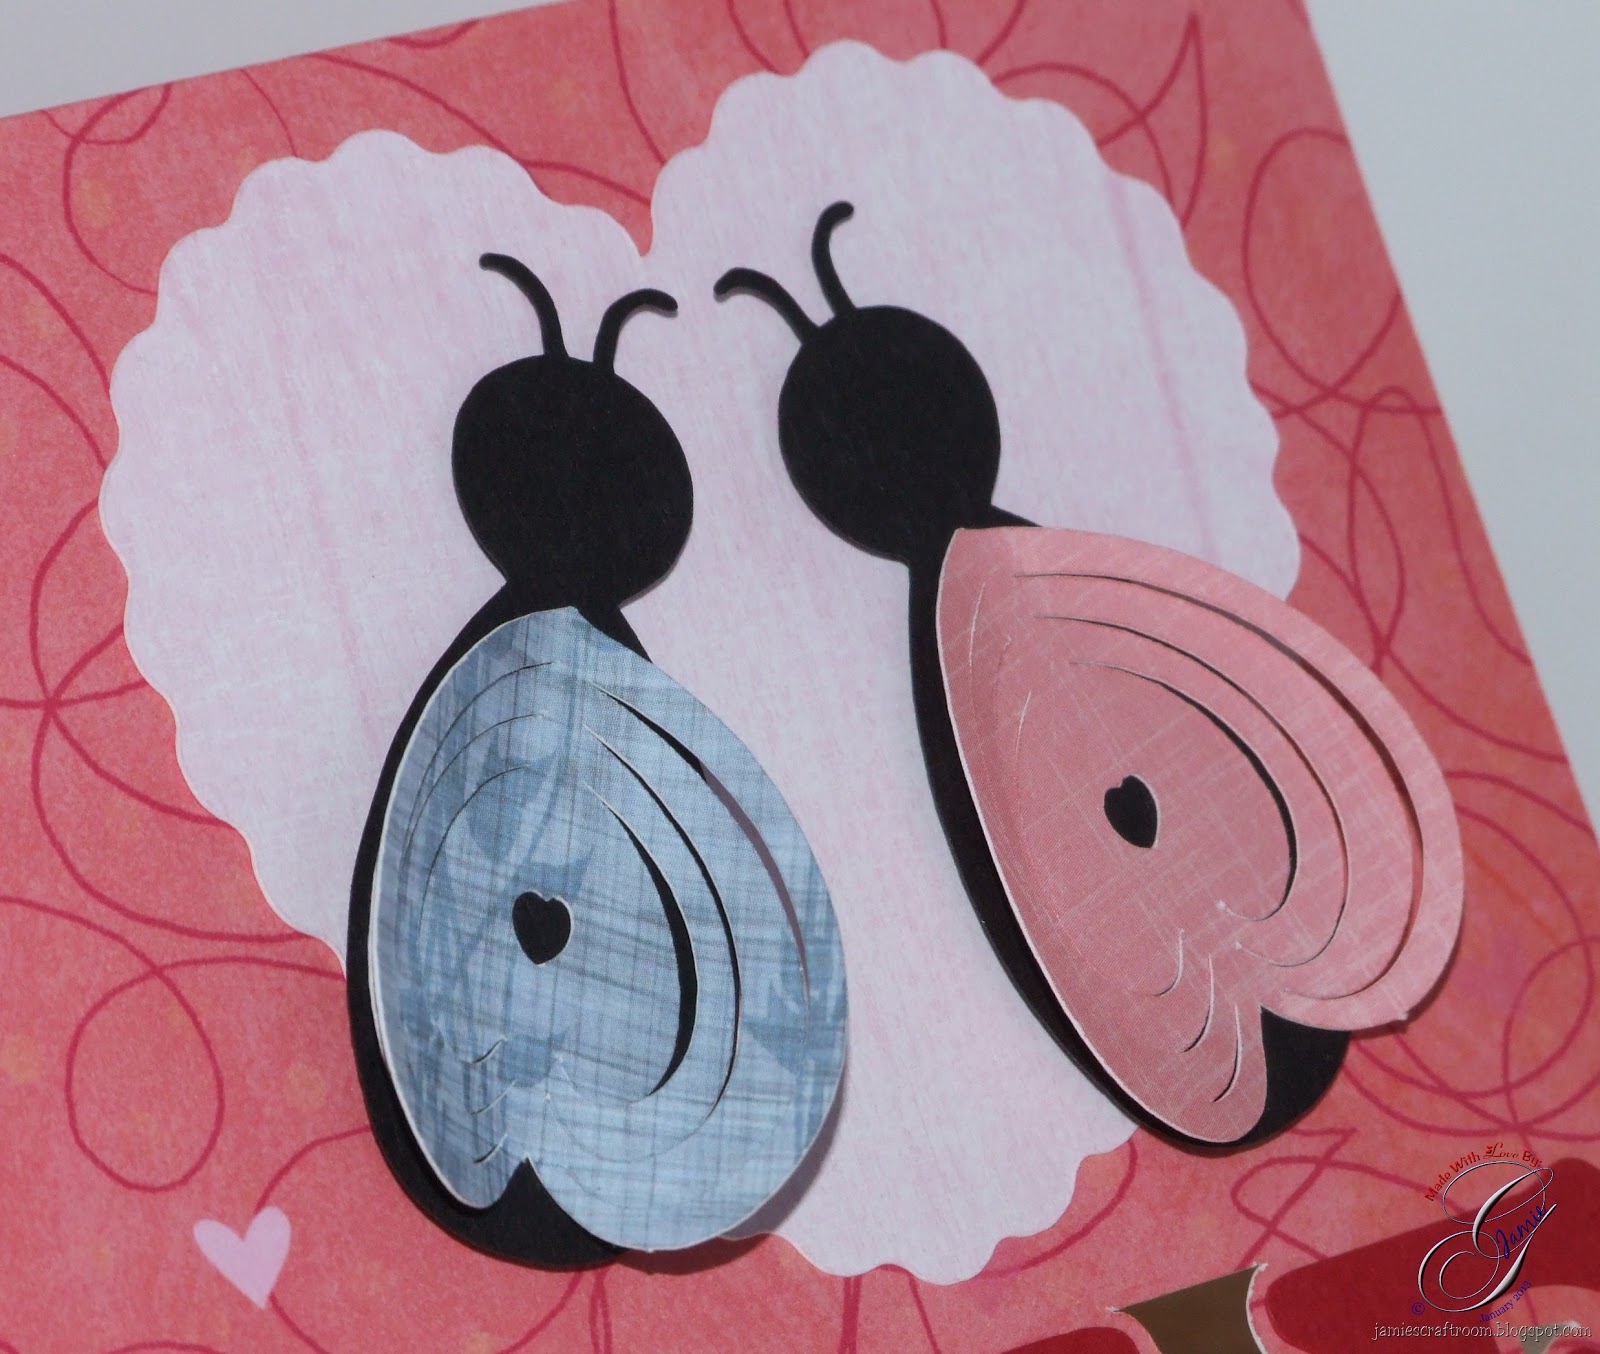
This project was complete because of a request that I to make a tutorial on how to weld letter to a card base.  After creating the tutorial and making the cut file I just had to make one!  :o)


The heart behind the love bugs I created in Funtime by using the scissor feature on a heart that was already available.

Those adorable little love bugs are available through Boss Kut Designs.  ADORABLE!!

 
Thanks for looking!!
*´¨)
¸.•´¸.•*´¨) ¸.•*¨)
(¸.•´ (¸.•` ¤ Jamie*´¨)

Tuesday, January 1, 2013

Thank You Cards and Envelopes Gift Set


Machine Used: BossKut Gazelle
Software: Funtime Scrapbooking III
Files Used: Layering Snowflakes by Debbie Grommet BKD 078, Sassy Bird Pop Kut 0421
Materials: Card stock, Pen of choice, rhinestones

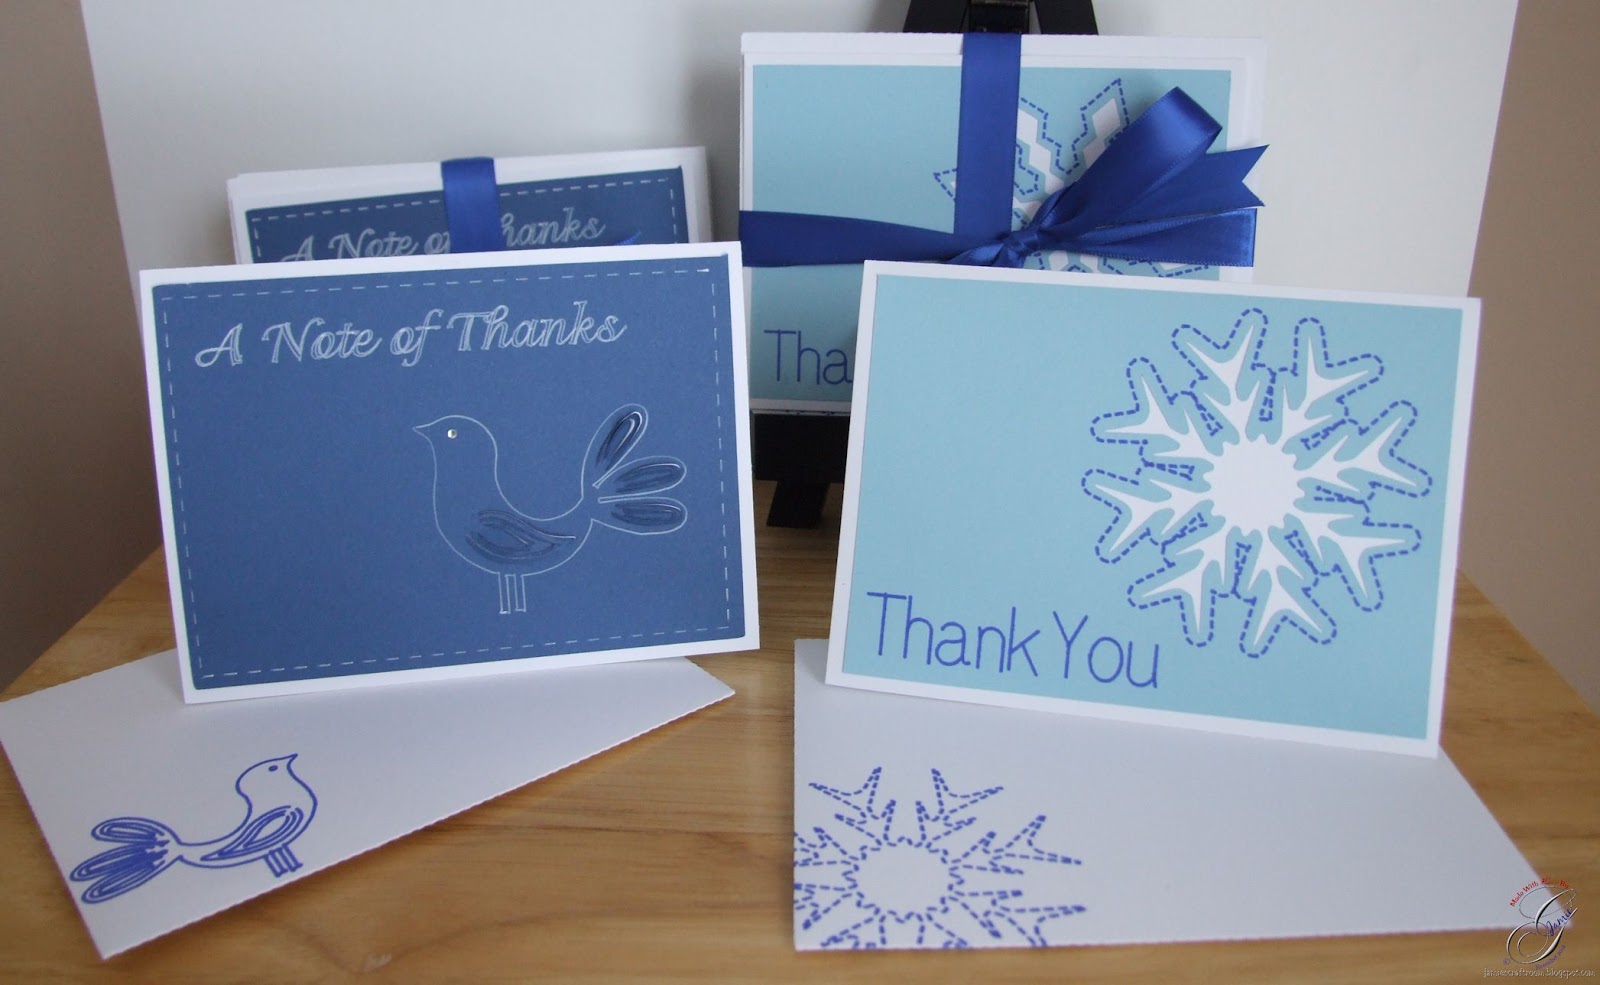
For this project, I had several different objectives in mind.
  • To have the envelope and card match.
  • Keep the card design CAS (clean and simple) so that I could easily make lots of them as needed.
  • With the simplicity of the design, I could give sets to family and friends as gifts no matter their taste.
For the snowflake thank you card set, I started in Funtime by taking the layering snowflakes and outlined them.  I then changed the line to a kiss cut line.

Using a blue Sharpie pen, I let my Gazelle "cut" out the sentiment and the outline of the snowflake.  I replaced the pen with the blade and let my Gazelle cut out the snowflake and the rectangle.  I attached the light blue paper to a white card base and simple enough.

The envelope was just as easy.  I created the envelope cut file in Funtime and positioned the matching snowflake where I wanted it.  Again using the blue Sharpie I "cut" out the snowflake and changed back to the blade to cut and score the envelope.


For the thank you card set with the pop kut sassy bird, in Funtime I choose 2 colors to work with. This made it easy when it came to cutting my project and to differentiate between what I was actually cutting and what I was "cutting" with my pen.

I started by creating 2 rectangles and centering them.  The inner rectangle I changed the line to a kiss cut line and made sure that the rectangles had 2 different colors.  For the sentiment and the outline of the bird, I made sure to make them the same colors as the kiss cut on the smaller rectangle.

Once I had everything laid out as I wanted it, I inserted a white gel pen into my Gazelle and "cut" the kiss cut rectangle, the sentiment, and the outline of the bird.  I exchanged the pen with the blade holder and cut out the rectangle and the wings, and the tail feathers of the bird.

I just loved the way the white gel pen created a perfect faux stitching effect on the rectangle!

As with the previous envelope, I created the cut lines and then placed the bird I wanted it.  I "cut" the bird out using a blue Sharpie and then the larger rectangle.
 
 
The picture below shows the 2 different kiss cut options available in Funtime.  You can easily access these by selecting the line that you would like to change, then select Setting > Brush / Pen.  Keep in mind that the next line you create will be the last pen option you choose.
 

Thanks for looking!!
*´¨)
¸.•´¸.•*´¨) ¸.•*¨)
(¸.•´ (¸.•` ¤ Jamie*´¨)
BossKut Design Team Member

For more projects and information, please click links below:
BossKut Gazelle Blog
BossKut Company Blog

Tuesday, December 4, 2012

Winter Friends


Machine Used: BossKut Gazelle
Software: Funtime Scrapbooking III
Files Used: Santa and the Snowman coloring page
Materials: Card stock, Glossy Accents, Mod Podge, fine glitter
Challenges: The Outlawz Twisted Thursday - Anything Goes/Winter Friends Twist

I started this card by using a coloring book page that I found online.  I opened it up in my PaintShop Pro and started coloring.

In Funtime I typed out the text "Winter Friends" using the font Hobos available in Funtime.  I then created an outline and cut both out.  I added some Glossy Accent to the white of the sentiment.

Thanks for looking!!
*´¨)
¸.•´¸.•*´¨) ¸.•*¨)
(¸.•´ (¸.•` ¤ Jamie*´¨)

Thursday, November 29, 2012

A Fairy Christmas


Machine Used: BossKut Gazelle
Software: Funtime Scrapbooking III
Files Used: Fairy Poinsetta Digi Stamp by Make it Crafty, Christmas Corners 1 Digital Cutting File by Bird
Materials: digi image, card stock, red rhinestones, green pearls, stickles
Challenges: The Outlawz Paper a la Mode - Anything Goes

My first project including a digi image that I've "colored."  Now, I don't have the Copics or other similar types of markers so I used my Paint Shop Pro!

I did some research and looked for tutorials on how to color an image and then shaded it.  I did have a lot of fun learning something new and working with this image.  One of the things that I learned is that I'll need to be more dramatic when shading my images to achieve that POP that I see in so many beautifully colored images.


After I printed her out, I added some clear stickles to her beautiful wings.
 
For the holly border, I took one of the Christmas corners, copied 5 more of them in a circle and welded them together in my Funtime.
 
After cutting it out with my Gazelle I added some red rhinestones and silver stickles.

Thanks for looking!!
*´¨)
¸.•´¸.•*´¨) ¸.•*¨)
(¸.•´ (¸.•` ¤ Jamie*´¨)

Saturday, November 3, 2012

Eat More Chicken!!


Machine Used: BossKut Gazelle
Software: Funtime Scrapbooking III
Files Used: Eat More Chicken by KaDoodle Bug Designs
Materials: Card stock, pearl stickys
Challenges: The Outlawz Twisted Thursday - Anything Goes Thanksgiving

Here's a simple card that I made using the adorable cut file from KaDoodle Bug Designs.  I did run into some disagreements with the glue but overall I don't think that it turned out too bad.  I used a paint pen for the sentiment "Eat more chicken!!"

Thanks for looking!!
*´¨)
¸.•´¸.•*´¨) ¸.•*¨)
(¸.•´ (¸.•` ¤ Jamie*´¨)

Thursday, November 1, 2012

CAS Cupcake Card


Machine Used: BossKut Gazelle
Software: Funtime Scrapbooking III
Materials: Card stock, ribbon
Challenges: The Outlawz Sunday Clean and Simple - Treats
 
This project I worked on and completed with my daughter.
 
I found the cupcake image at www.dulemba.com,  artwork © Elizabeth O. Dulemba.
 
After importing the image into Funtime, I created a cut image from it.  I then did a print and cut with it, so that I could fussy cut around the image.  Then my dearest daughter and I got to work coloring!  Now, please keep in mind that I've seen tons of fellow crafters who use Copics.  I'm working on heading that direction myself but for this project I broke out the good ole Crayola markers!  LOL  Hey, we all gotta start somewhere.
 
For my daughters card, she chose purple for her paper because it's her favorite color.  :o)
 

Can you tell she helped pick the colors for me on my cupcake?  This really was one of my most favorite projects and I'm really looking forward to working on another one with her soon!

 
Thanks for looking!!
*´¨)
¸.•´¸.•*´¨) ¸.•*¨)
(¸.•´ (¸.•` ¤ Jamie*´¨)

Tuesday, October 30, 2012

Give Thanks Easel Card


Machine Used: BossKut Gazelle
Software: Funtime Scrapbooking III
Files Used: Oak Leaves 0449, Maple Leaf by Judy Stark
Materials: Card stock, glitter, brads
Challenges: The Outlawz Saturday Paper a la Mode - Use Negative Space

Creating an easel card in Funtime is really very simple.  I'm going to use the very basics of tools, going step by step to make it super easy to follow along!  Be sure to check out the video tutorials available.  I've watched each of them at least once and many of them countless times.  I like going back to watch them because I've always seemed to forget something!!

I start out by creating a rectangle, making sure that it's selected, and then right click on it.  That will bring up a list of options; at the bottom select either height or width.  The transformation box will pop up with another list of options.  Select "Condense" so that it is highlighted in blue, then change the W. to 8 and the H. to 4, select apply.  These are just the dimensions that I chose for this project.

 
Then you have a couple of options, you can either create 2 score lines in Funtime or once you've cut the rectangle you can use a scoring tool and do it by hand.  For learning purposes, I'm going to explain how I do it in Funtime.
 
Now that the rectangle is the size I want it, I'm going to put it in the lower left hand corner so that I can make sure the score lines will line up where I want them.  I start by selecting the rectangle and then click on the transformation box again.  This time I'm going to select "Position," and then change the X Pos. to 0 and the Y Pos. to 0, select apply.  This will place the rectangle in the lower left of your mat.

 
For me personally, I like to make my cut lines and my score lines 2 different colors.  I do this just in case some times I want my Gazelle to score my lines and then other times I may choose to do that by hand.  It just depends on how many items I'm making.
 
After selecting another color from my color palette, I select the scoring tool.  In this tutorial I'm just going to place my score mark anywhere on my mat, concentrating on making sure that it's straight.  I do this because it's easier for me to use the transformation box options to change the height and the position.
 
Select the score line and select height this time in the transformation box.  Change the H. to 4, select apply. I'm using 4 as the height because we want to score the full height.  Then select the position, change the X Pos. to 2 and the Y Pos. to 0, select apply.  This will place the score line along the 2 inch mark along the X axis and right against the Y axis.

 
We need 2 score lines on this card, so we will use the same technique.  Create the score line, change the height to 4 but this time after selecting position, change the X Pos. to 4 and the Y Pos. to 0.


For my card in this example I rounded the edges of the card.  You can do this by first selecting "manipulate elements" and then "round corner."  When you first select a corner of your rectangle a box will pop up asking for the radius value.  I used 0.25 for this project, then click on OK.  It will change the corner you initially clicked on.  Click on the rest to change them as well; the box asking for the radius value will not pop up again.
 

Once I have the base of my card completed, I usually make a couple extra layers for future use.

One last thing I do before saving and closing my project (besides making something :o)) is select the entire base, including the cut and score lines, and group them together.
 

I hope this helps you in creating that special card for someone special!  Be sure check out the video tutorials  and don't forget to drop by the BossKut Forum Learning/Training Center.

Thanks for looking!!
*´¨)
¸.•´¸.•*´¨) ¸.•*¨)
(¸.•´ (¸.•` ¤ Jamie*´¨)
BossKut Design Team Member

For more projects and information, please click links below:
BossKut Gazelle Blog
BossKut Company Blog

Friday, October 19, 2012

Autumn Card


Machine Used: BossKut Gazelle
Software: Funtime Scrapbooking III
Materials: Card stock, ribbon, brads
Challenges: The Outlawz CAS - Autumn and Leaves
 
I'm still working on mastering the clean and simple card.  It's really not as easy as I thought it should be . . .
 
For this card, I stuck mainly with my manual paper cutter and only utilized my Funtime to print out the sentiment directly on the card.
 

The images are from some designer paper that I simply cut out and added a border.

Thanks for looking!!
*´¨)
¸.•´¸.•*´¨) ¸.•*¨)
(¸.•´ (¸.•` ¤ Jamie*´¨)

Friday, October 12, 2012

Thinking of You Card and Kusudama Bouquet


Machine Used: BossKut Gazelle
Software: Funtime Scrapbooking III
Files Used: Pop-Kut Butterfly Border by Judy Stark BKD152, Ruffled Butterfly by Judy Stark BKD105
Materials: Cardstock, ribbon, shank style buttons, stem wire, rhinestone
Challenges: The Outlawz Paper a la Mode - Thinking of You

It doesn't matter what time of year it is or what holidays are around the bend, sometimes you just need to let someone you know that you're thinking about them.  For this project I wanted to send a very special someone a handmade card and a bouquet of flowers that she's mentioned she likes.  :o)

With the new Pop-Kut Butterfly Border available, I just knew that I needed to use it!  It's absolutely adorable and sure to put a smile on any one's face!  With the one on this card, I added some color on part of the wings and some glitter.


I don't have a large collection of stamps with just the right sentiments but the print and cut option, it's really easy to say just the right thing.  In Funtime, I create the sentiment, with the fonts and colors I like and simply cut the shape around it!

 
I wrapped some thick ribbon around my card and using pop dots attached the sentiment.


With the Ruffled Butterfly, I added some glitter on the pop kuts of the wings and a rhinestone on the head.  In order to incorporate it into the bouquet, I used a floral stem wire and glued that between the the 2 pieces.  A simple addition to the bouquet that really makes it!!

A simple card and a bouquet of handmade flowers are now on their way to brighten the day of one very special woman!

Thanks for looking!!
*´¨)
¸.•´¸.•*´¨) ¸.•*¨)
(¸.•´ (¸.•` ¤ Jamie*´¨)
BossKut Design Team Member

For more projects and information, please click links below:
BossKut Gazelle Blog
BossKut Company Blog

Tuesday, October 9, 2012

Thinking of You Step Card


Machine Used: Boss Kut Gazelle
Software: Funtime Scrapbooking III
Files Used: O'Hannah Oval Frame Set by Judy Stark BKD129
Materials: Cardstock, pearl heart brads, purple rhinestones
Challenges: The Outlawz Paper a la Mode - Thinking of You

Here a simple step card that I made to send to one very special lady in my life.  I started by creating a 4.25 x 5.5" step card in Funtime.  I've made this file available in the Gazelle Owner's Forum under *File Sharing*.

For the bottom border, I had to weld a few more the decorative pieces together to get it long enough.  After attaching it to the card, I added some purple rhinestones.


I added the sentiment to the oval frame and used a couple of pearl heart brads to secure it to the card.


Thanks for looking!!
*´¨)
¸.•´¸.•*´¨) ¸.•*¨)
(¸.•´ (¸.•` ¤ Jamie*´¨)
Bosskut Design Team Member

For more projects and information, please click links below:
Bosskut Gazelle Blog
Bosskut Company Blog
Related Posts Plugin for WordPress, Blogger...